If you are already a VTEX customer and wish to adopt this functionality for your business, please contact Commercial Support. Additional fees may apply. If you are not yet a customer but are interested in this solution, please fill out the contact form.
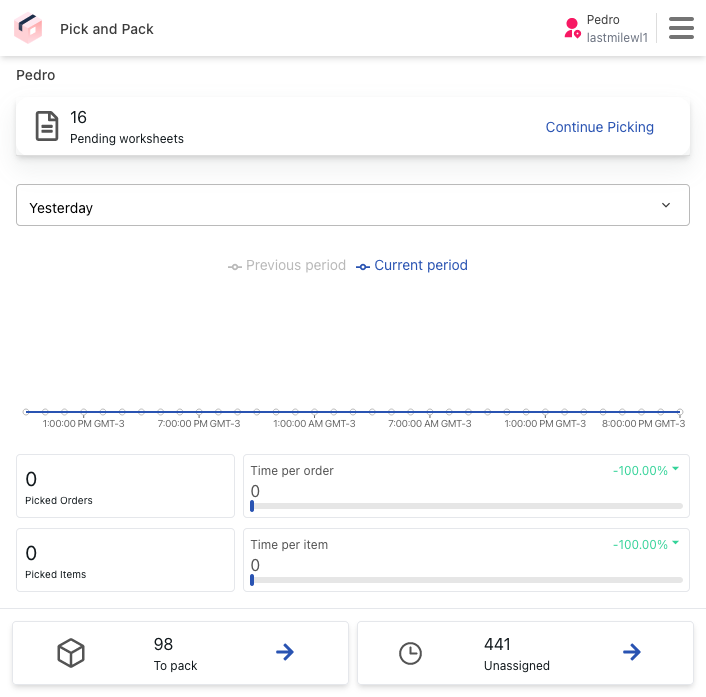
The VTEX Pick and Pack mobile app helps the picker — the person who picks and packs items in the facility — handle orders, from picking to shipping. This makes the store's order picking and delivery flow smoother and more efficient.
Order handling is divided into three steps, following the usual store order flow:
Menu
The VTEX Pick and Pack app menu provides the main features to help you navigate and complete tasks. Through it, you can access different areas of the app more efficiently.
Tap the icon in the top-right corner to open the menu, where you'll find the following fields:
- Summary: Takes you to the app's home screen.
- : Logs out of the app.
- History: Redirects to the history of completed worksheets.
- Language: Changes the app language.
- Change to : Changes the facility where the order picking will be done.
- Pending: Redirects to the pending worksheets screen.
- To pack: Redirects to the worksheets that are awaiting packing.
- : Notification area showing the latest changes to the worksheets.
- Claim your next task : Redirects to the screen for creating worksheets.
To collapse the menu, tap Close Menu .
Worksheets
A worksheet consists of a set of orders that will be processed by the Pick and Pack flow simultaneously. This allows for efficient management and speeds up the processing of multiple orders at once.
For example, a worksheet with only three orders:
-
Order 1: A red t-shirt and a pink skirt.
-
Order 2: Two red t-shirts and a white hat.
-
Order 3: A pink skirt and a white hat. When selecting this worksheet for handling, the app will display the following items for picking:
-
Three red t-shirts.
-
Two pink skirts.
-
Two white hats.
The app will then help you pack each order with its respective items.
Worksheets only apply to the order picking and packing steps. You must ship each order separately.
Creating worksheets
The image of the tab below lists the orders that should be selected for worksheets.
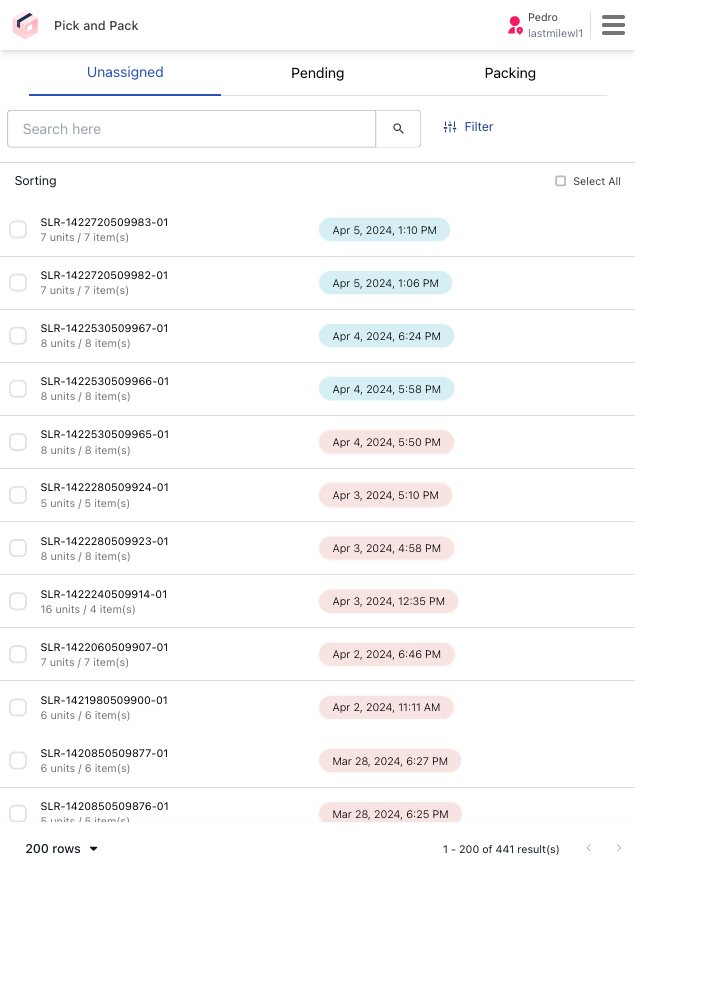
The order list displays information as follows:
| Order | Delivery by |
|---|---|
| Shows the order number along with the item quantity and total items. | Order delivery due date. |
To create a worksheet, follow the steps below:
- Tap the menu .
- Tap the
Claim your next taskbutton. - Select the orders you want to add to the worksheet. To create a worksheet with all the orders, click
Select All. - Click
Start Picking.
To search for an order, enter the order ID in the search bar. To filter the order list, tap and select one or more of the following options:
- Delivery Date
- Categories
- Payment Methods
- Shipping Strategy
- Shipment Type
Picking items
The picking step consists of manually selecting the items listed in a worksheet and taking them to the appropriate packaging area in your facility.
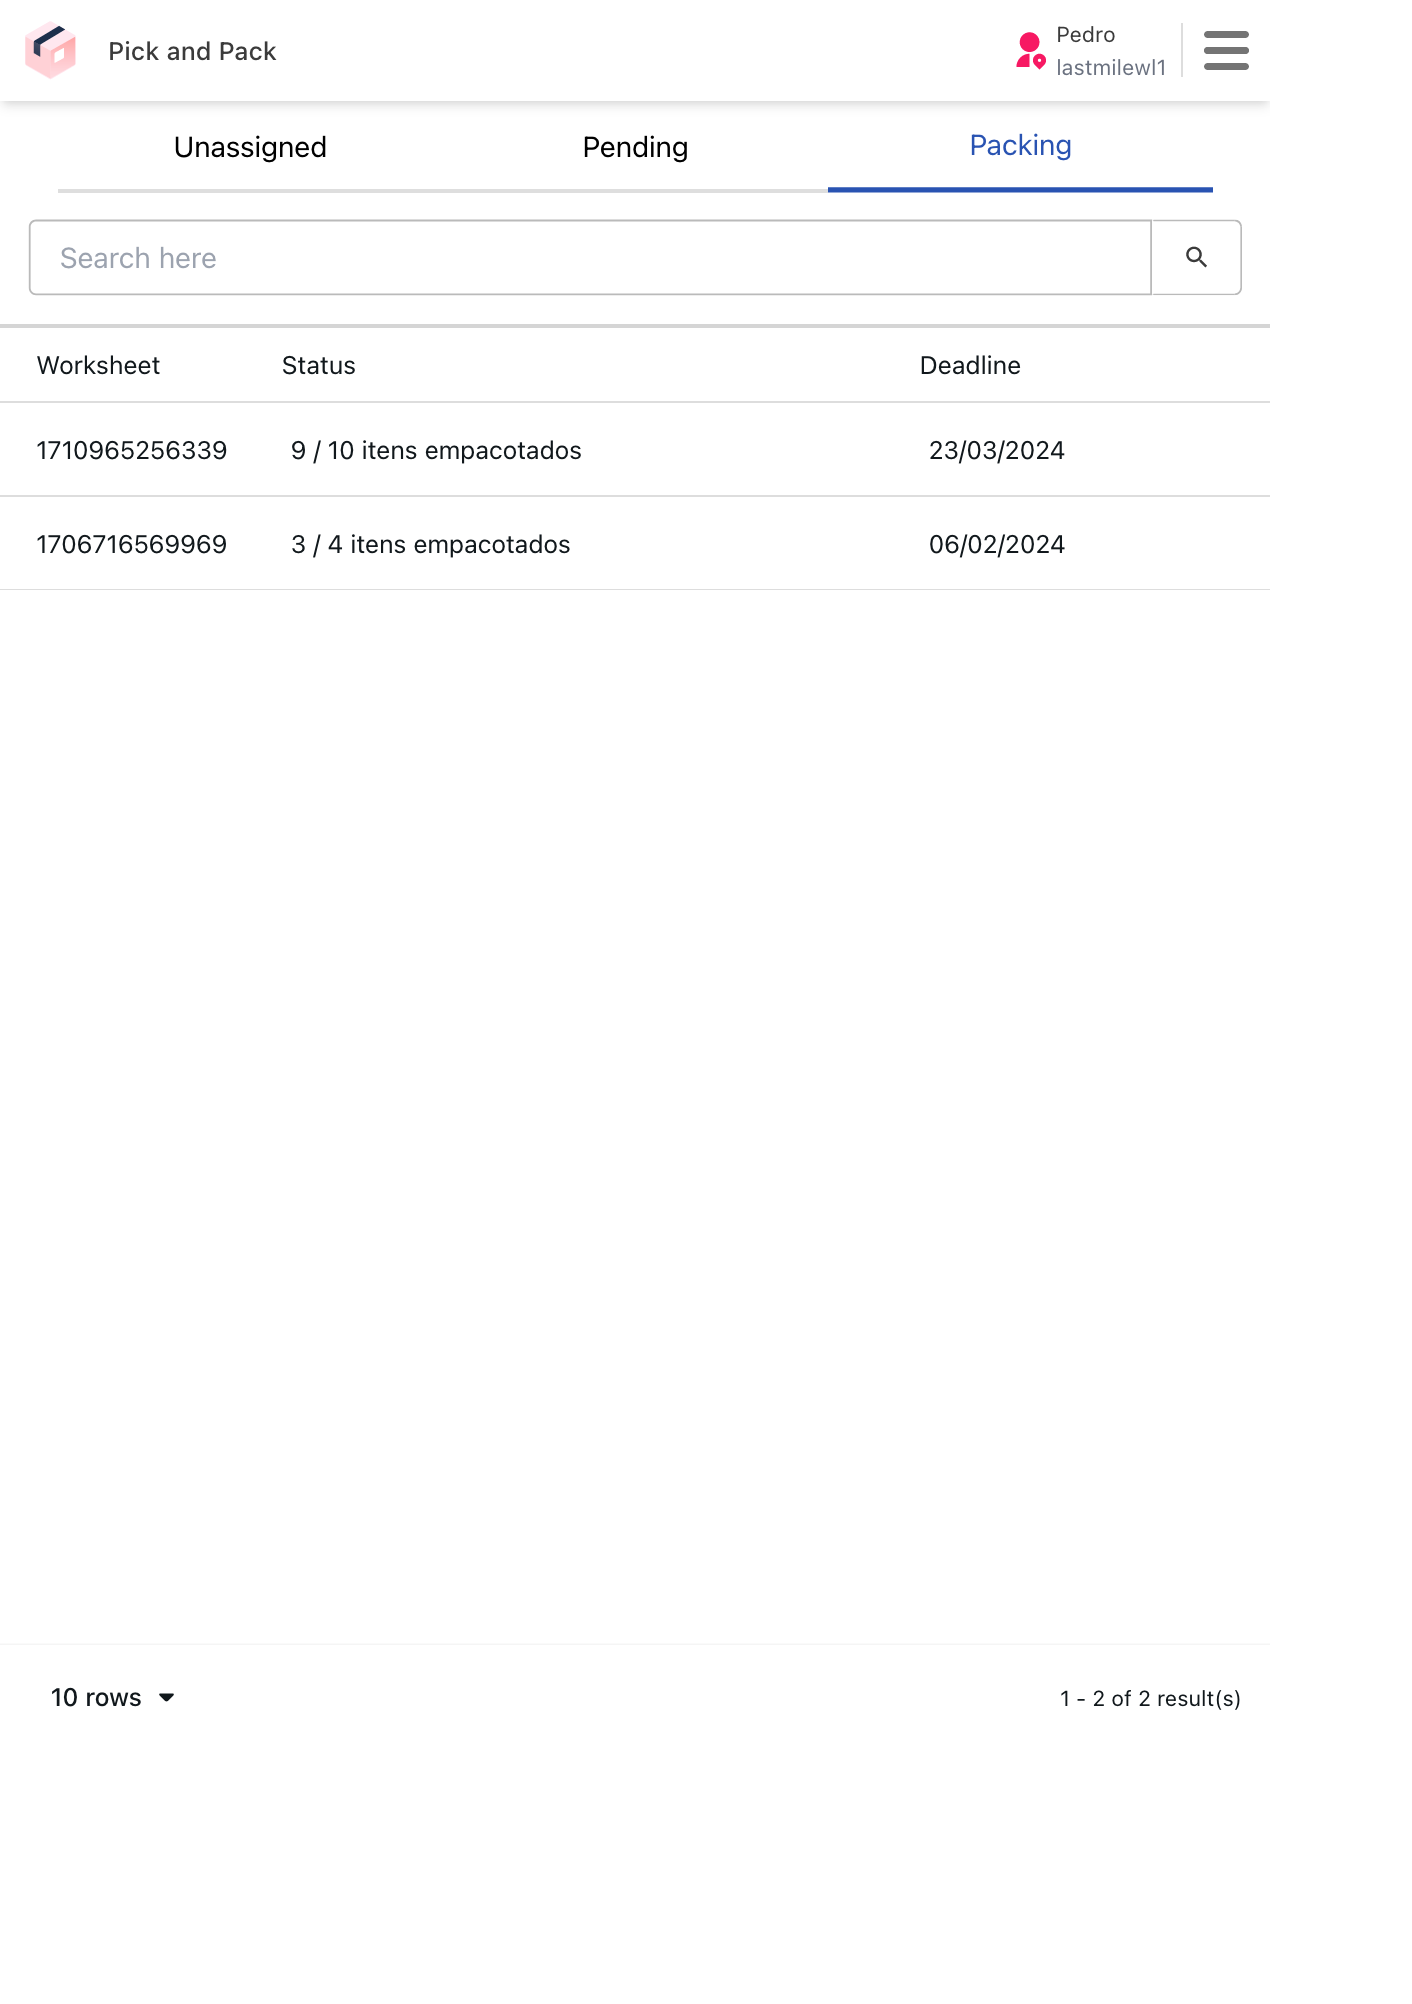
Pending worksheets
The Pending worksheets tab displays the list of worksheets that haven't been picked yet, as shown in the image below:
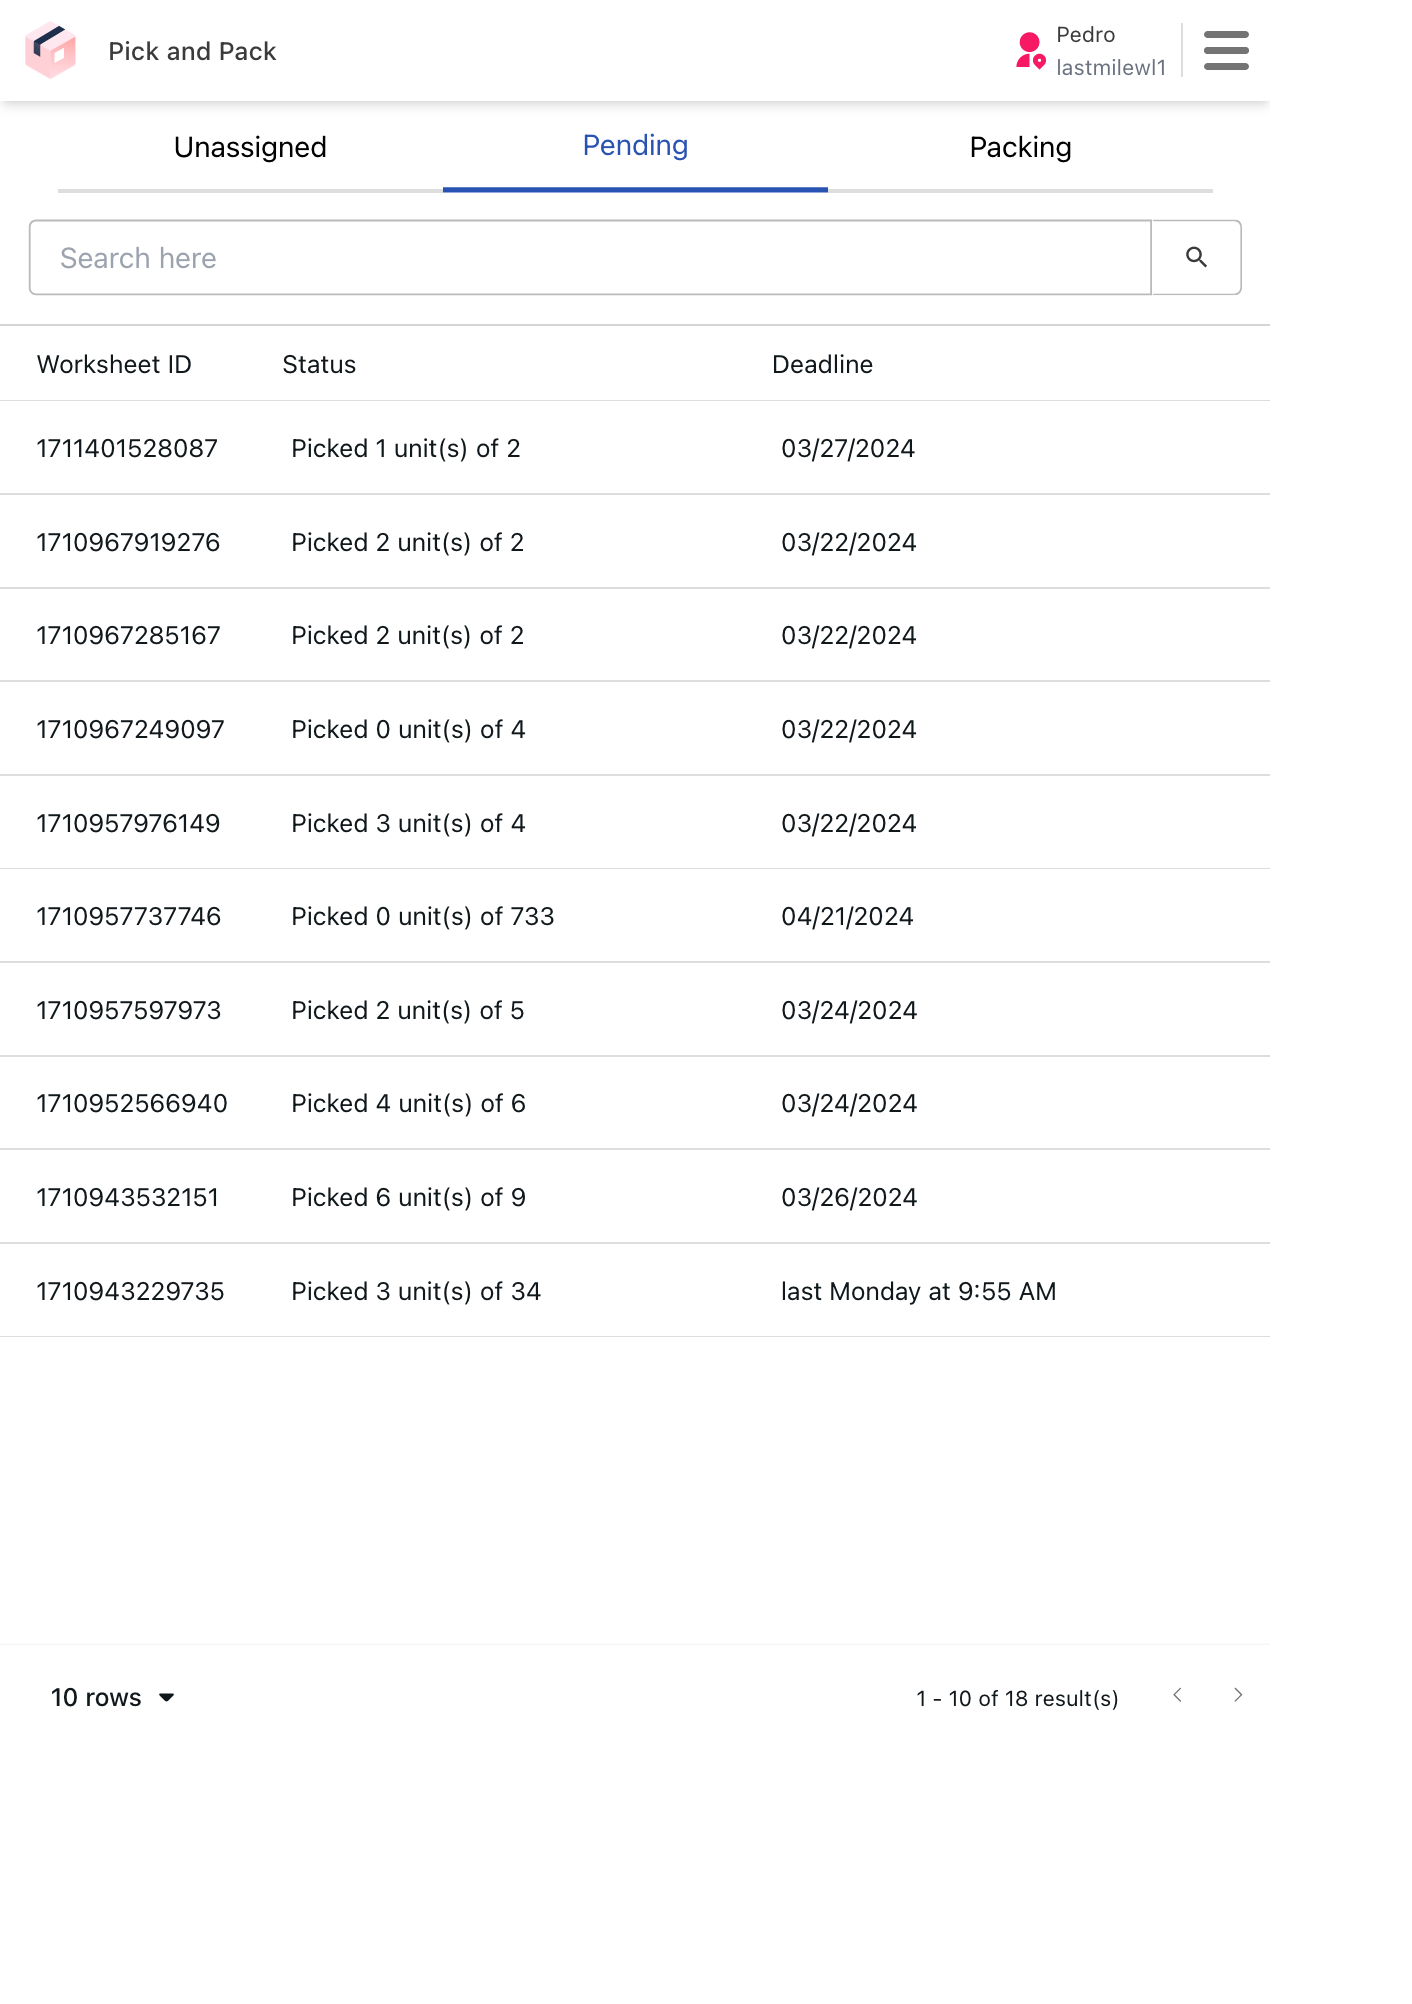
In this tab, you can select the worksheet ID if you only want to see the picked items from that order.
If there are worksheets assigned to the picker, you can access them from the picking screen by following these steps:
- Tap the menu .
- Select Pending. A list will be displayed with the worksheets assigned to the picker in the picking step.
- Select the button on the worksheet of the order you want to pick.
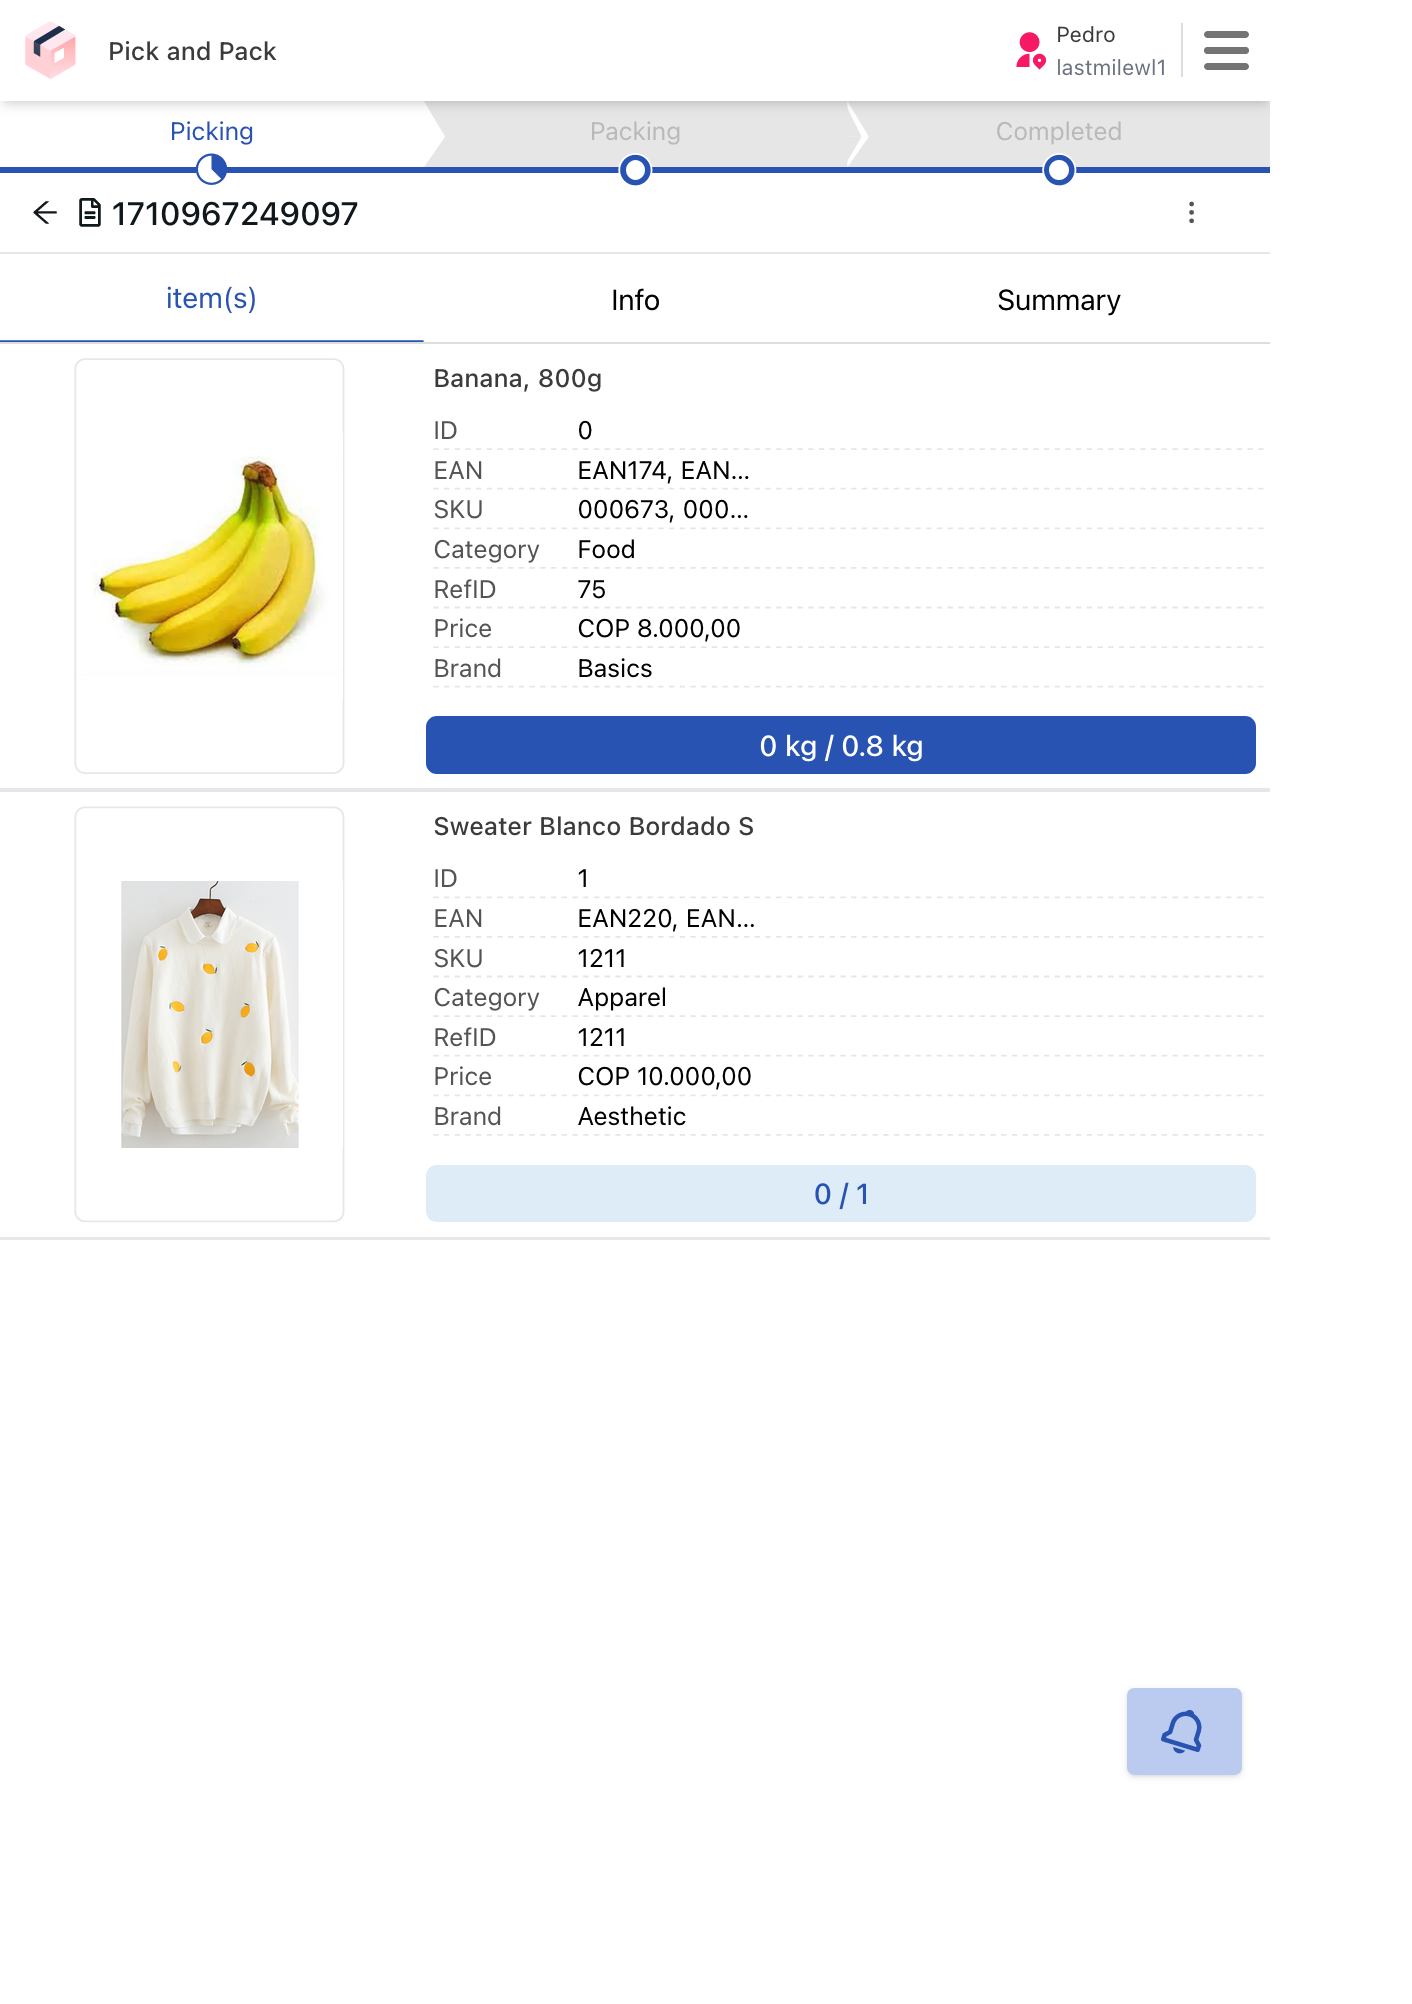
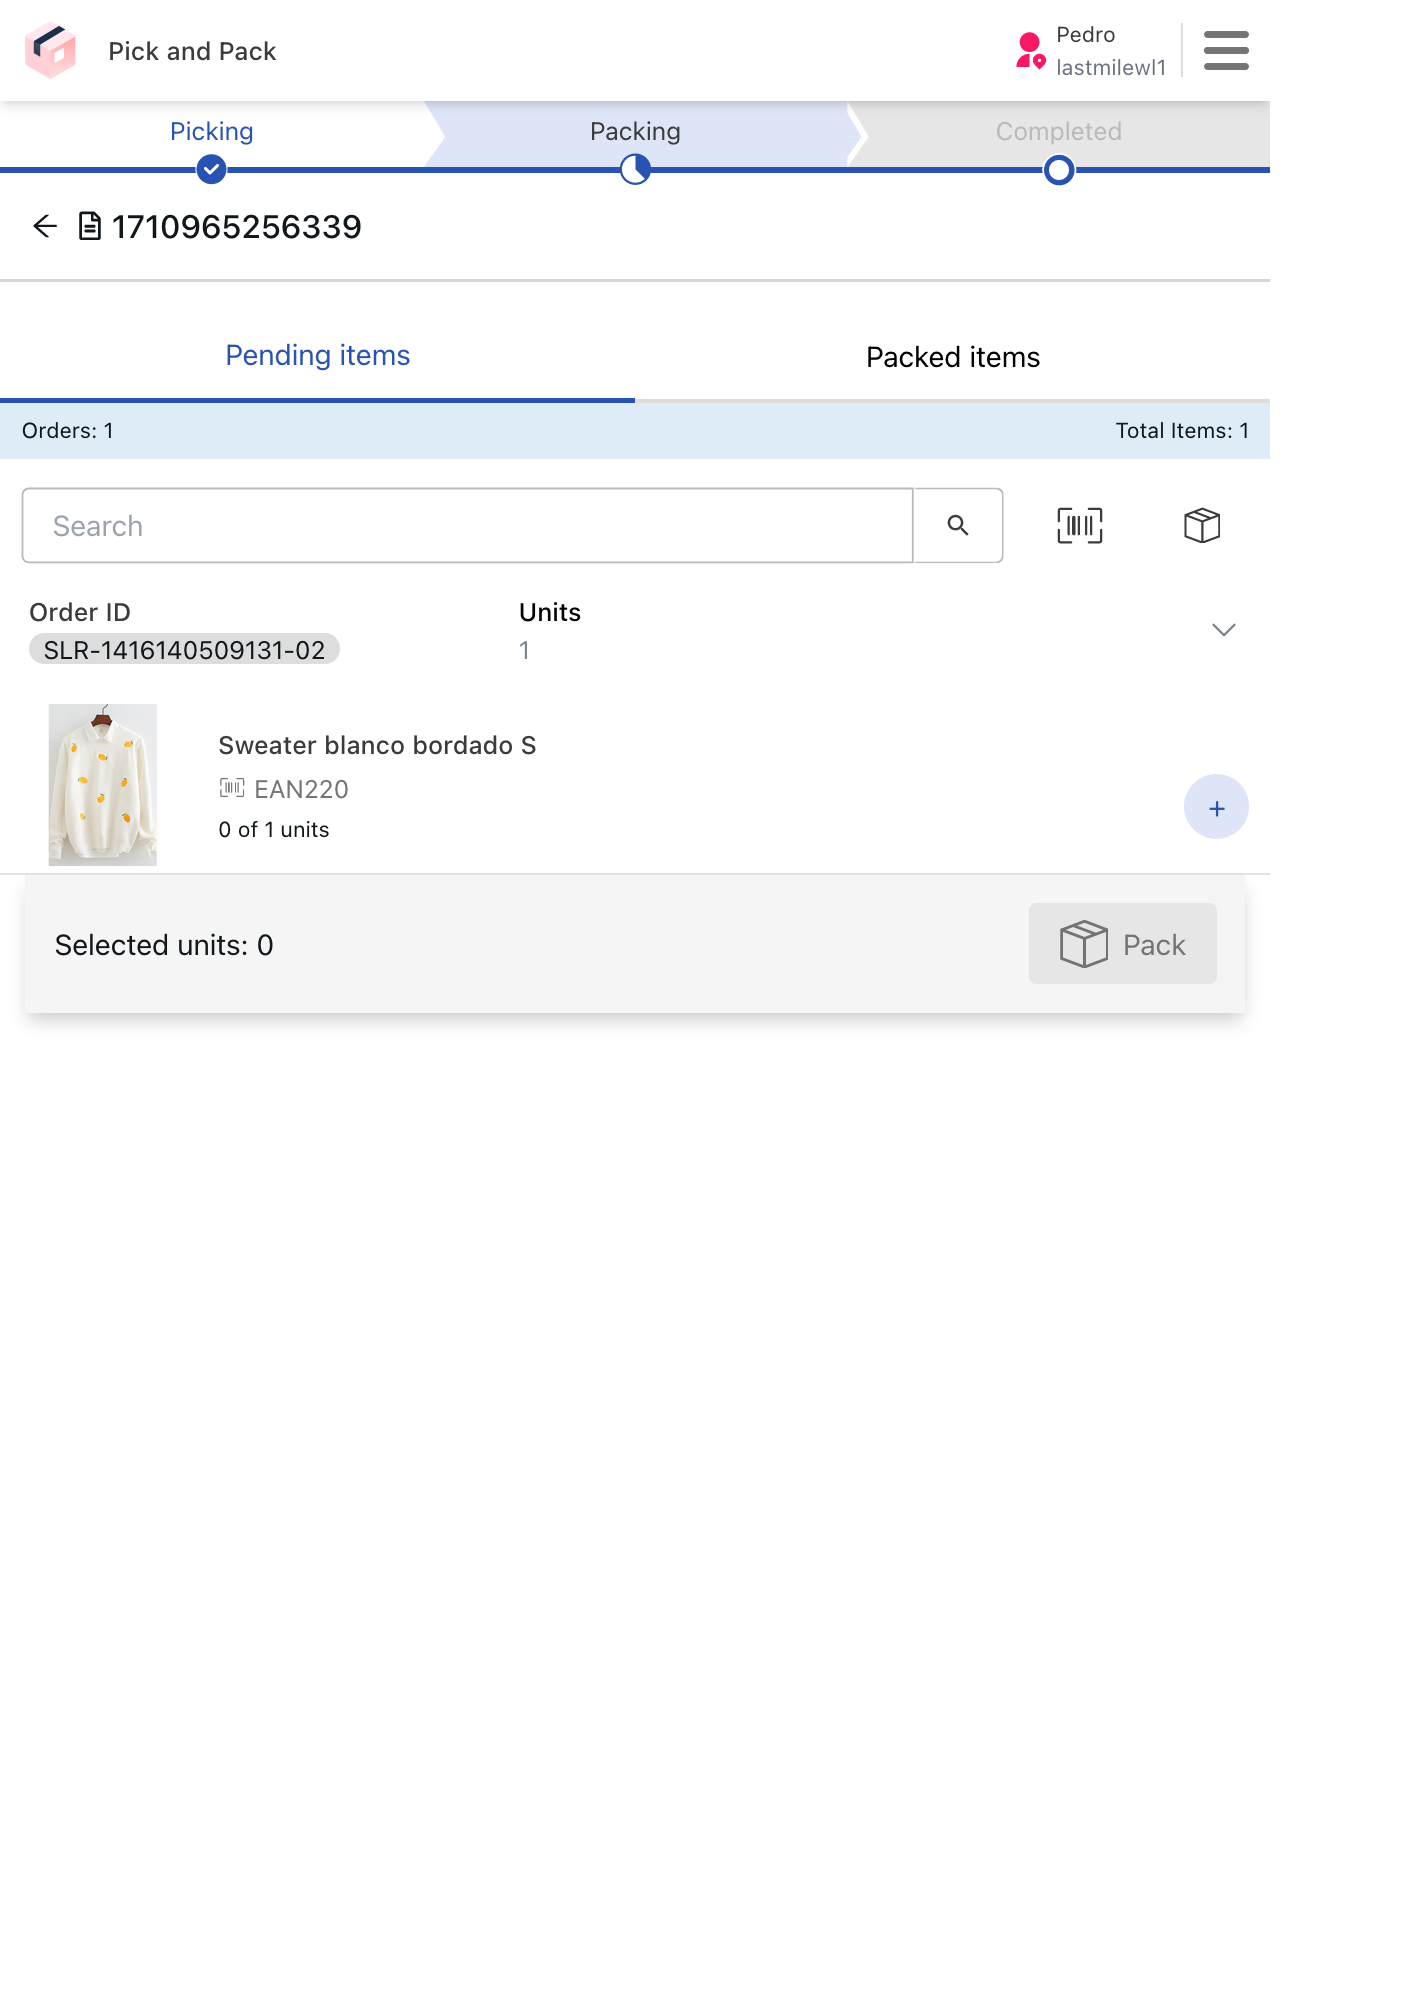
When clicking a worksheet, the following information is displayed:
- Items: Products to be picked from the worksheet.
- Activity: Details of changes made to the worksheet, such as products added, quantities updated, and replacements.
- Info: General information about the worksheet and the order.
- Summary: Products that have already been picked.
By opening the menu, the following options will be displayed:
- Add Note: Adds a free note to the worksheet.
- Add items to order: Starts the flow to add new items to the order.
- Set as Ready for Packing: Used to bulk pick or bulk reject orders.
- Pause Picking: Pause the time count for picking the products listed in the worksheet.
- Open Barcode Reader: Uses the device's camera to read product barcodes.
- Print Picking List: Generates a document with the list of items in the worksheet for printing.
- Close Menu: Closes the menu and returns to the picking screen.
To pick an item, follow these steps:
- On the Picking screen, go to the Items tab.
- Select the item you want to pick or swipe the product to the right.
- Check the item quantity.
- Tap
Confirm PickingorConfirm and Pick All, when there are multiple units of the same item.
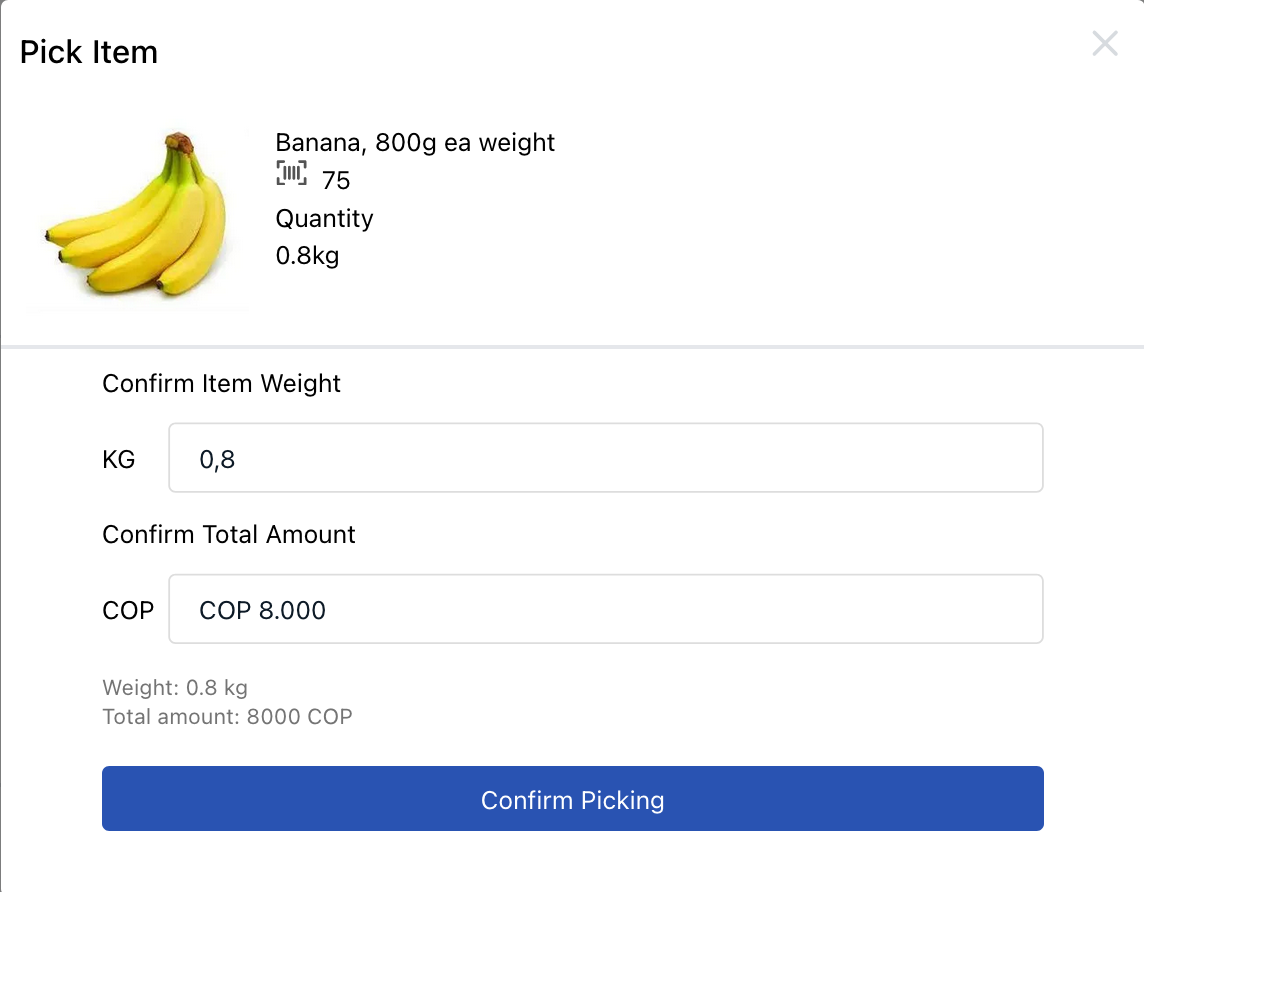
For products with weight or volume, confirm the measurements first, then confirm your selection, as shown in the example below:
- On the Picking screen, go to the Items tab.
- Select the item you want to pick or drag the product to the right.
- Enable the
Sync weight and price optionto automatically calculate and complete the total price of the item by its weight. Turn off the option if you want to manually enter the item's price and weight. - Select
Confirm picking.
To pick all the products from the worksheet at once, follow these steps:
- Tap the menu.
- Select the Set as Ready for Packing option.
- Select
Pick All Available Items.
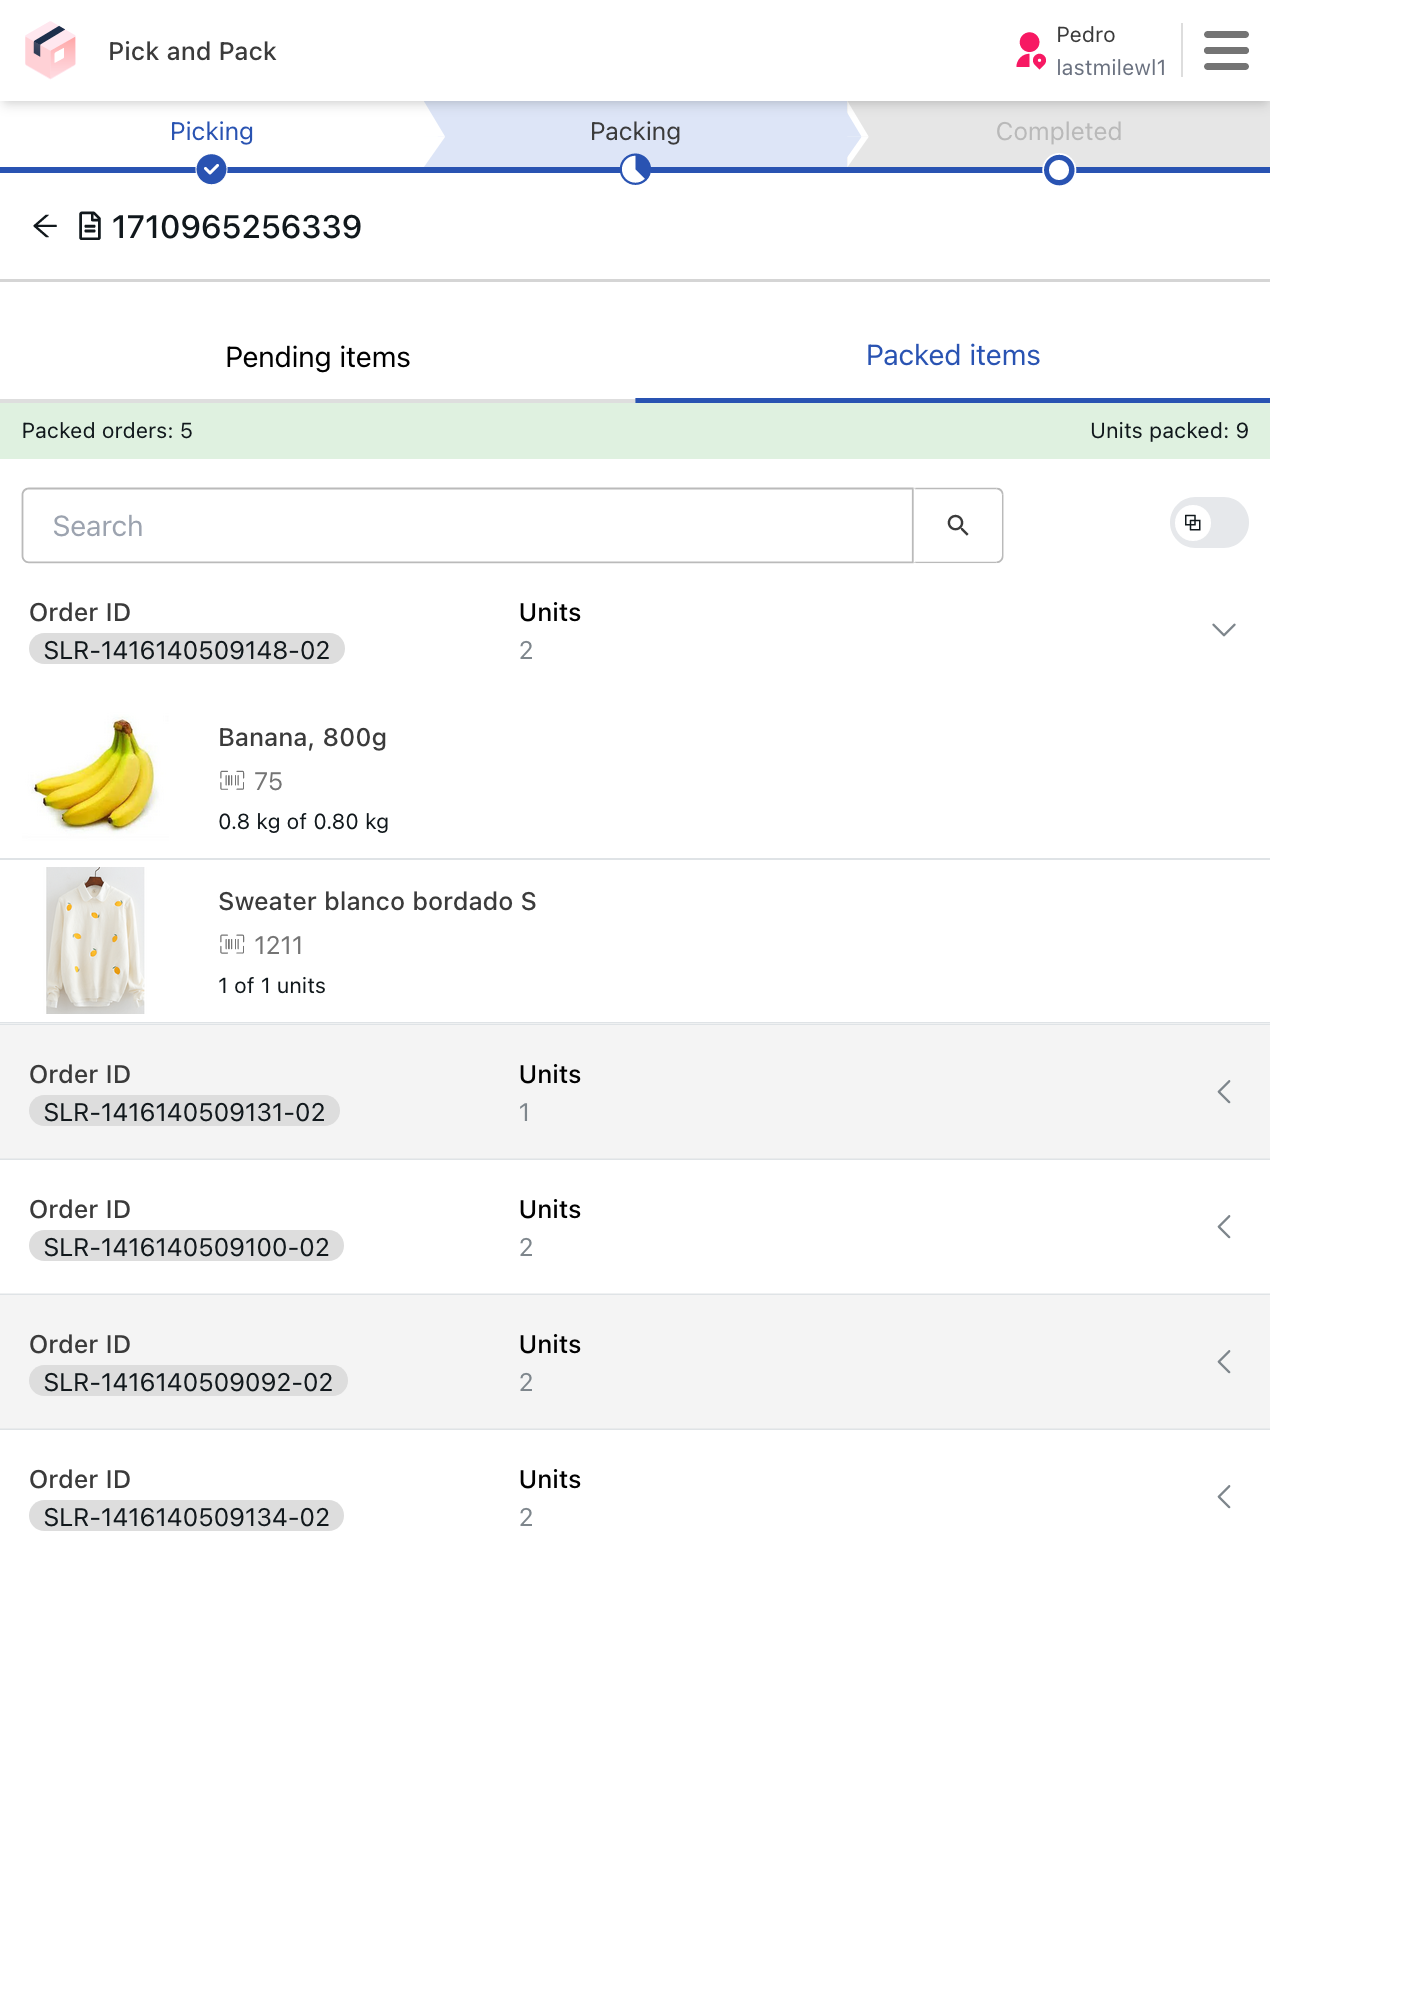
Once picked, the products will be listed in the Summary tab.
Change product quantity
During the picking process, the picker can manually update the quantity of a product. This may occur after a customer request, via call or text message, or when the available store inventory differs from what was initially added, for example.
This can be done in two ways:
By selecting the product
- On the Picking screen, click and hold the item whose quantity you want to change.
- Click the Add more units option.
- Select the correct quantity. The quantity of items that can be changed by the picker is defined on the Settings page in the VTEX Admin.
- Click Confirm changes.
By selecting the worksheet
- On the Picking screen, click the Info tab.
- On the desired order, click the menu.
- Click the Add more units option.
- Select the correct quantity. The quantity of items that can be changed by the picker is defined on the Settings page in the VTEX Admin.
- Click
Confirm action.
Add new products to an order
The picker can manually add new products to an order after receiving a customer request, such as a call or a text message. There are two ways to add new products to an existing order.
By selecting the product
- On the Picking screen, click the menu.
- Click the Add product to an order option.
- Select the order to which you want to add the new item.
- Scan the product barcode or search for it manually using the search bar.
- Select the desired quantity.
- Click Confirm selection.
By selecting the worksheet
- On the Picking screen, click the Info tab.
- On the desired order, click the menu.
- Click the Add new product option.
- Scan the product barcode or search for it manually using the search bar.
- Select the desired quantity.
- Click Confirm selection.
Rejecting items
There are some scenarios in which products may have to be rejected due to store settings and item availability.
To reject a product from the worksheet, follow the steps below:
- Go to the Items tab.
- Select and swipe the product you want to reject to the left.
- Enter the reason for item rejection in the textbox.
- Select the quantity of items you want to reject. The quantity of items that can be rejected by the picker is defined on the Settings page in the VTEX Admin.
- Select
Discard unitsto reject the selected quantity, orConfirm and Discard Allto reject all.
To reject all the products from the worksheet at once, follow these steps:
- Click the menu.
- Click the Set ready for packaging option.
- Click Reject All Available Items to finish picking.
If all the items from an order are rejected, the order will be completed automatically.
Replacing items
Pickers can also replace one item with another, depending on the store settings and item availability. This feature helps ensure that customers receive their orders on time, even if some items are unavailable.
To replace worksheet items, follow the steps below:
- On the Picking screen, click and hold the item whose quantity you want to change.
- Click the Replace item option.
- Scan the product barcode or search for it manually using the search bar.
- Select the desired quantity in units or add the weight value.
- Click Continue.
- Select the reason for the item replacement. The reasons listed are configurable in the Settings page.
- Click Confirm and pick replacement.
Completing the picking process
After all items on the worksheet have been picked, rejected, or replaced, click the Start Packing button to move the worksheet to the packing step.
Packing
During packing, the picker organizes order items into their respective shipping packages. The Pick and Pack mobile app allows you to organize all the packages needed for multiple orders easily.
You can access the Packing page once you have completed picking the items on a worksheet or by following these steps:
- Tap the menu .
- Tap Start Packing. A list will be displayed with the worksheets assigned to the picker in the packing step.
- Select the worksheet you want to start packing.
Follow the steps below to pack items:
- Under Packing, select the order you want to pack.
- Select the + button to confirm the quantity of the product you want to add to the package.
- Tap Pack Products.
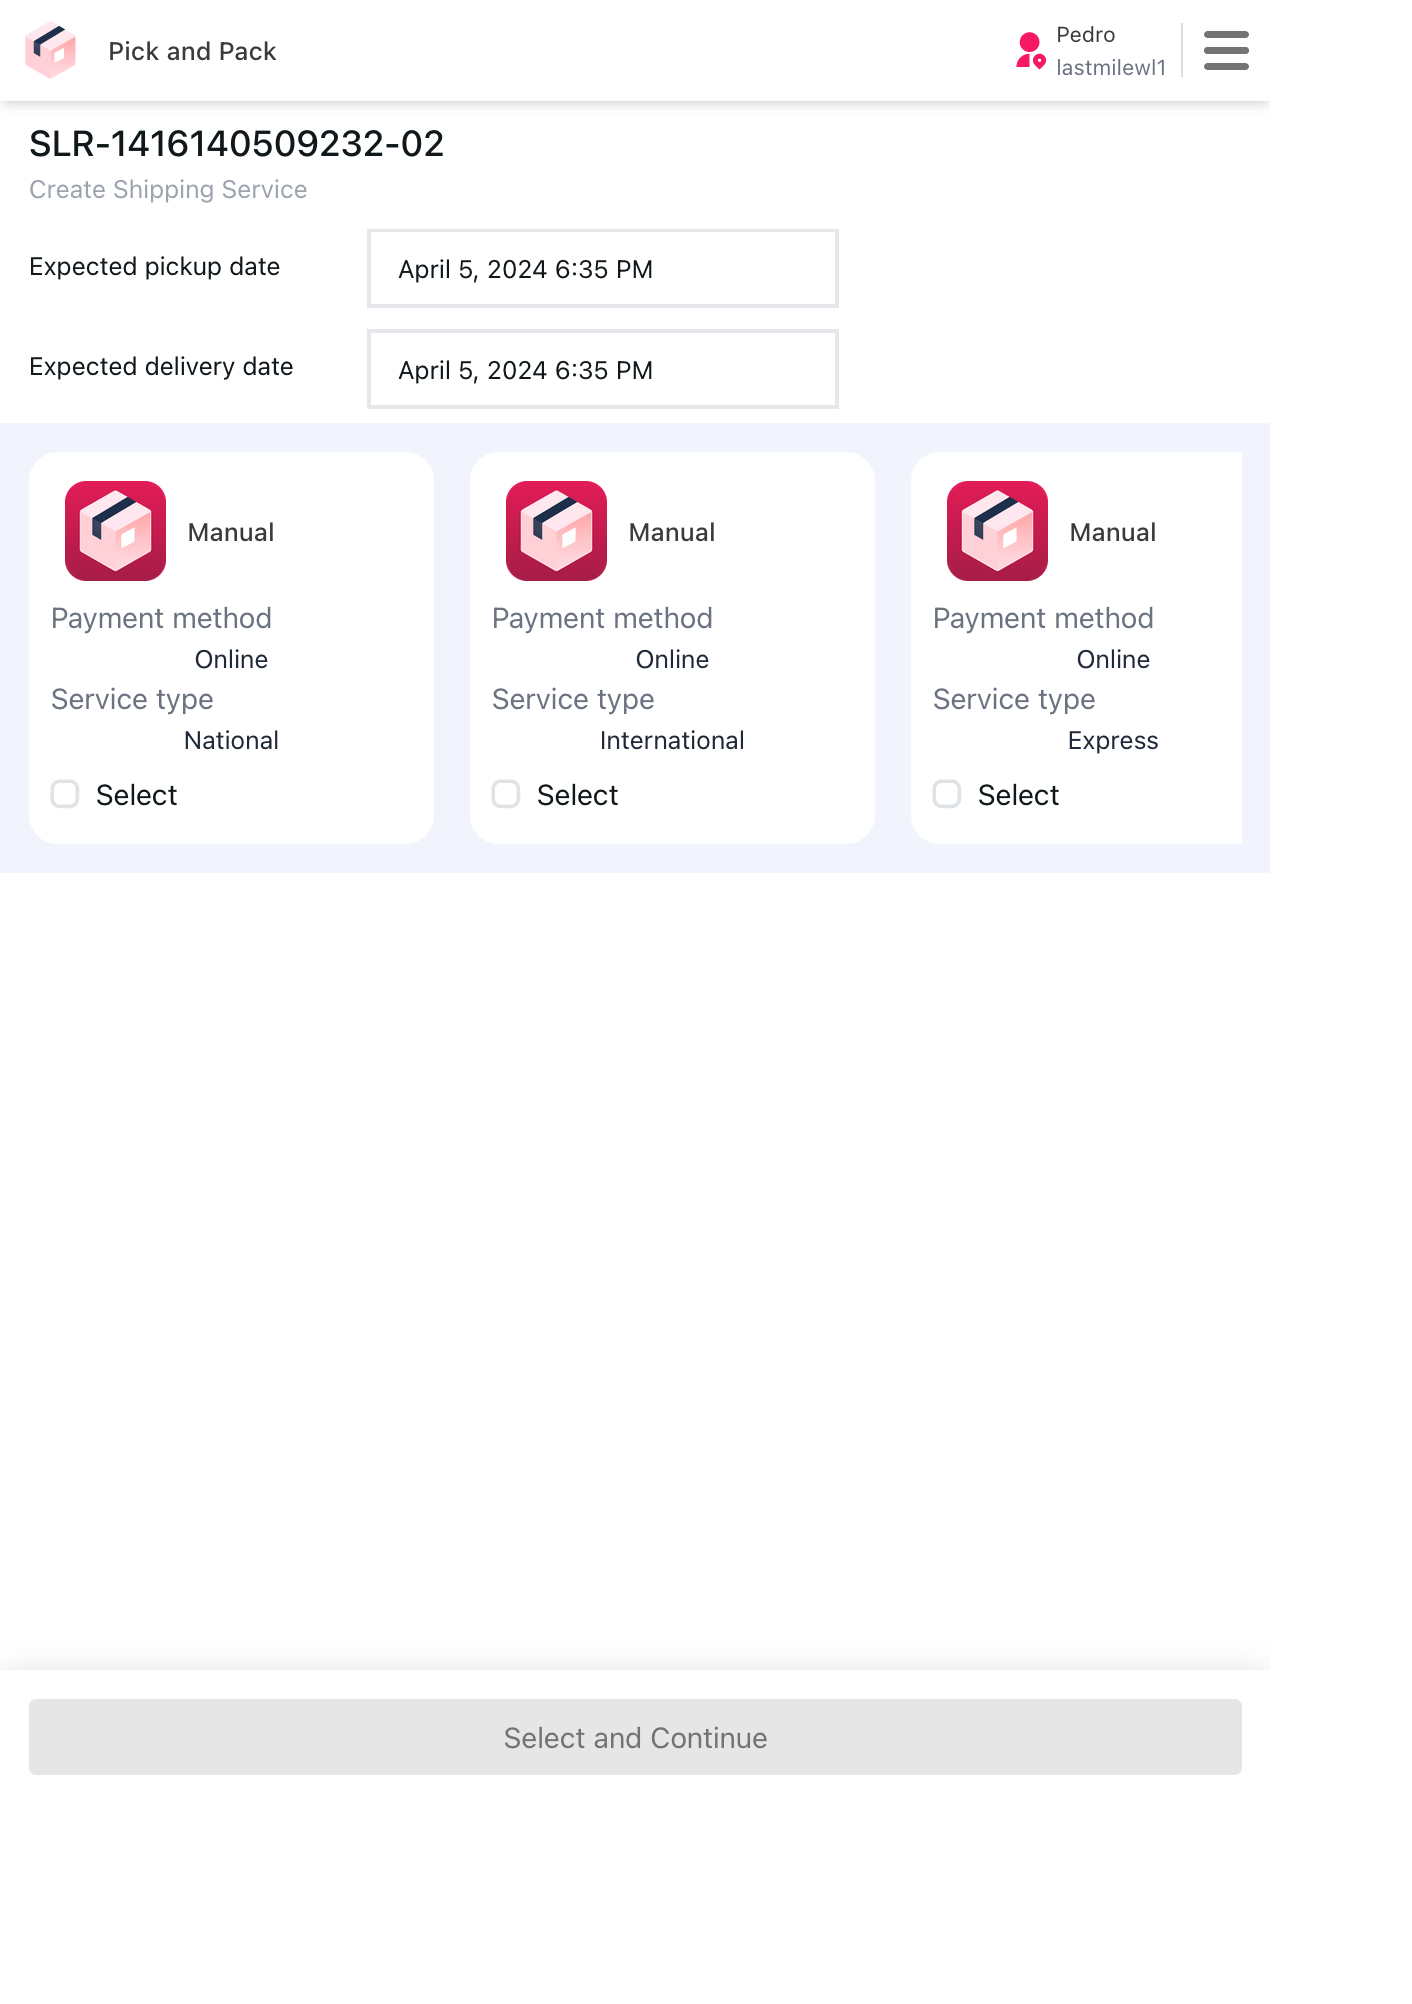
- Select an available package.
- Tap Pack Products.
- Enter the total weight of the package in kilograms (kg).
- Tap Save.
Custom package
- Under Packing, select the order you want to pack.
- Select the
+button to confirm the quantity of the product you want to add to the package. - Tap
Pack Products. - Add a new package by selecting Custom package.
- Tap Pack Products.
- Complete the following fields:
- Length in centimeters (cm).
- Width in centimeters (cm).
- Height in centimeters (cm).
- Total weight of the package in kilograms (kg).
- Tap
Confirm.
The product's own container
- Under Packing, select the order you want to pack.
- Tap the
+button to confirm the quantity of the product you want to add to the package. - Tap
Pack Products. - Add a new package by selecting No packing required.
- Tap
Pack Products. - Tap
Confirm.
You need to repeat this procedure as many times as necessary to pack all the items from a worksheet.
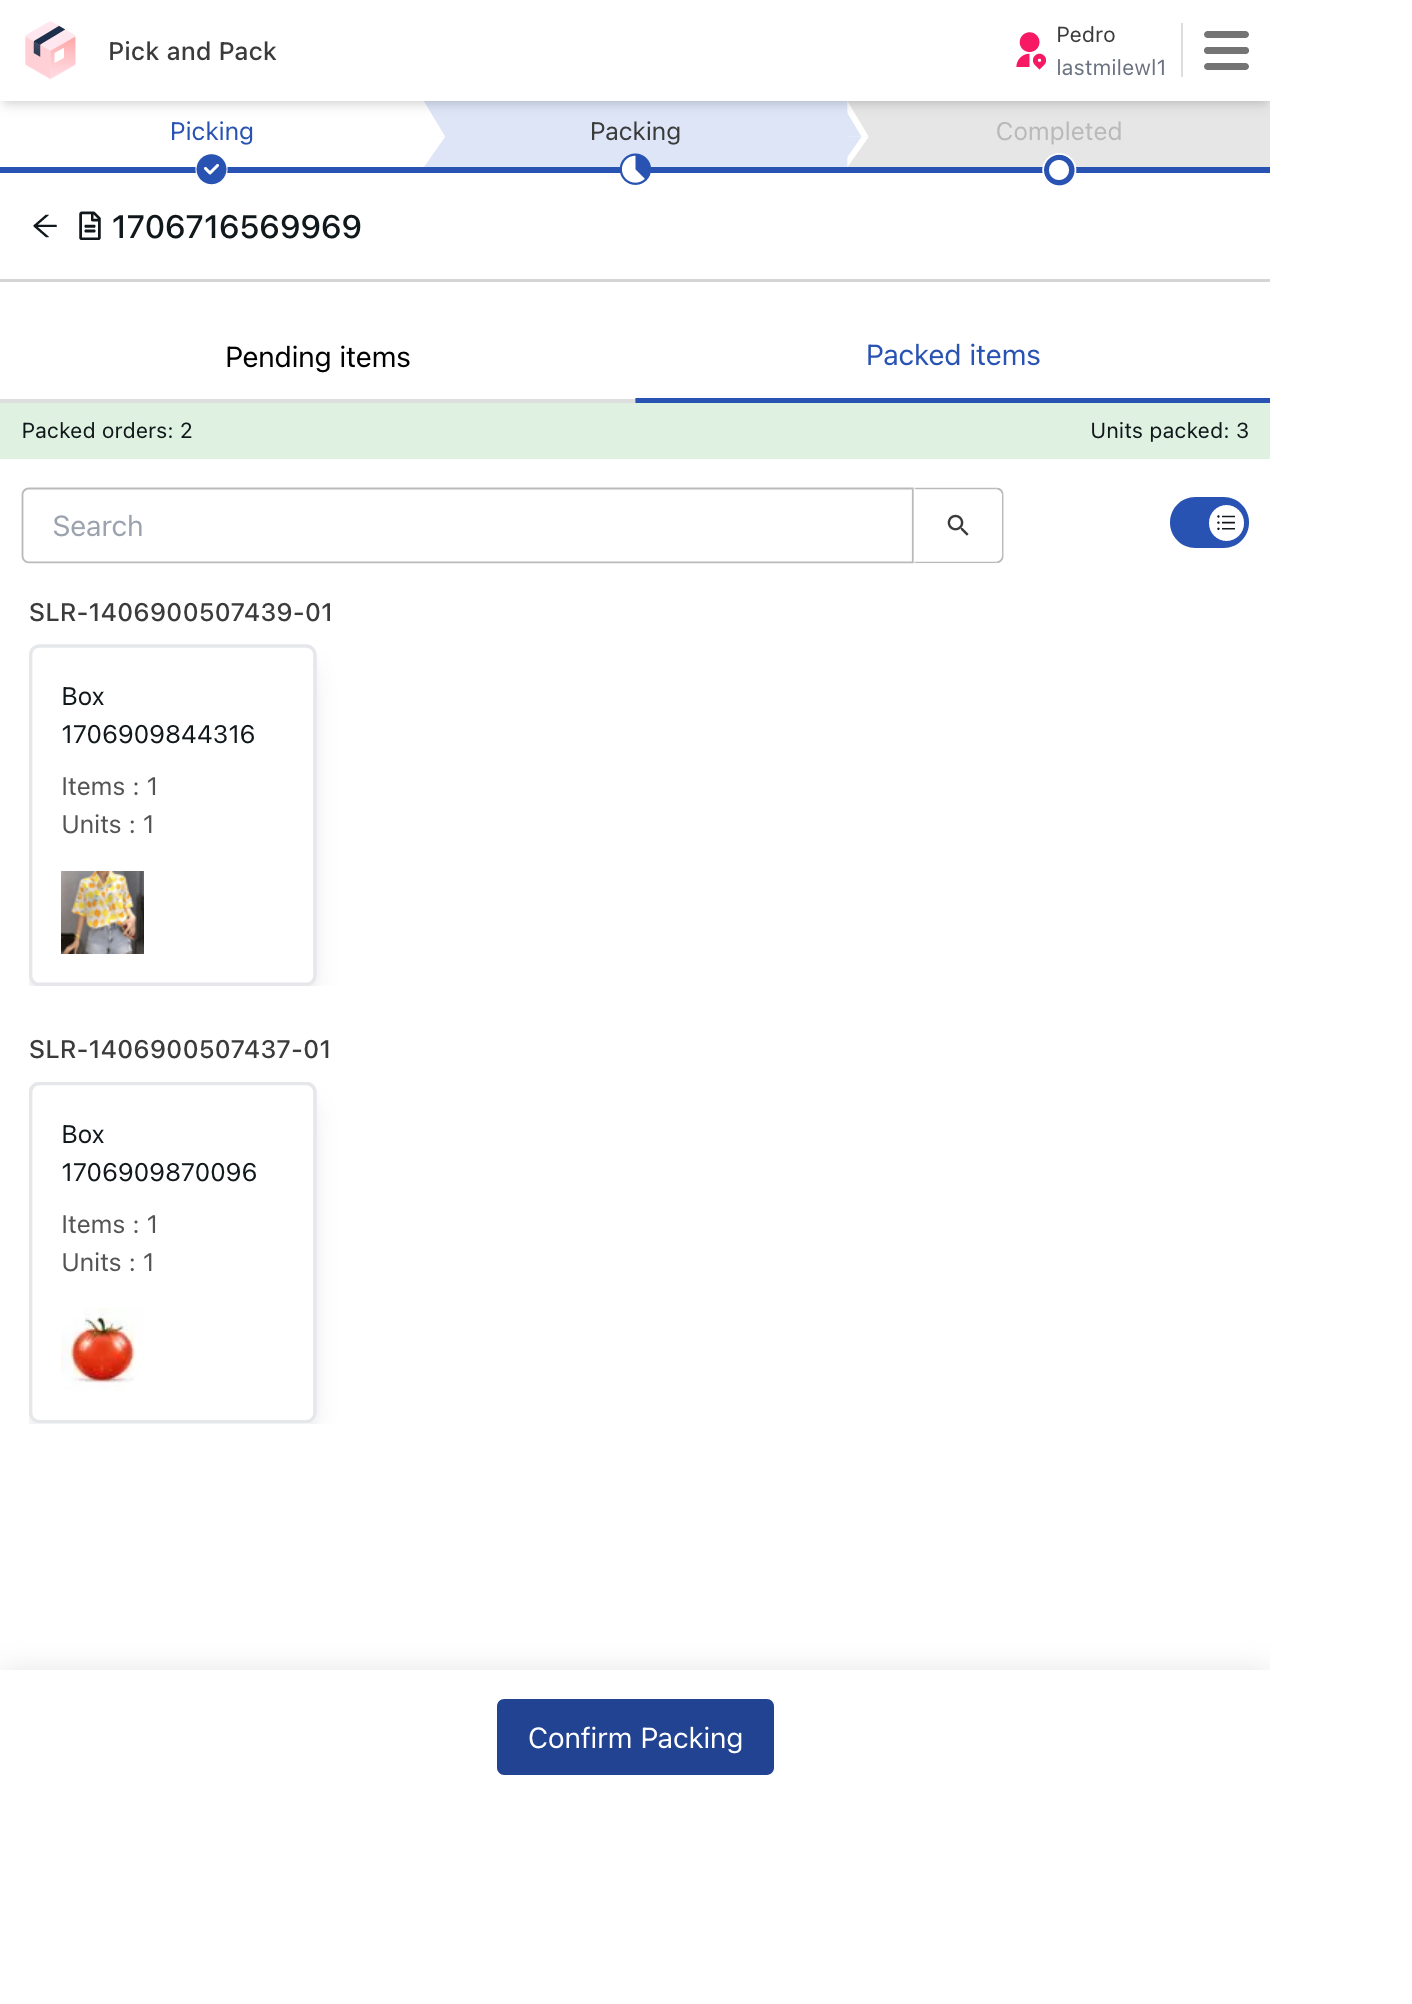
Items that have already been packed will be available in the Packed Items tab.
You can perform the following actions for each packed item by tapping the button:
- View details: Displays a window with the package details.
- Print labels: Generates a label that will be attached to the package.
- Set location: Registers the package location in a facility using the BIN code, which identifies a specific storage location in a warehouse.
- Remove package: Removes the package from the Packed Items list, so the item will need to be packed again.
To delete an item from the package, tap the corresponding X button.
To finish packing, tap Confirm Packing.