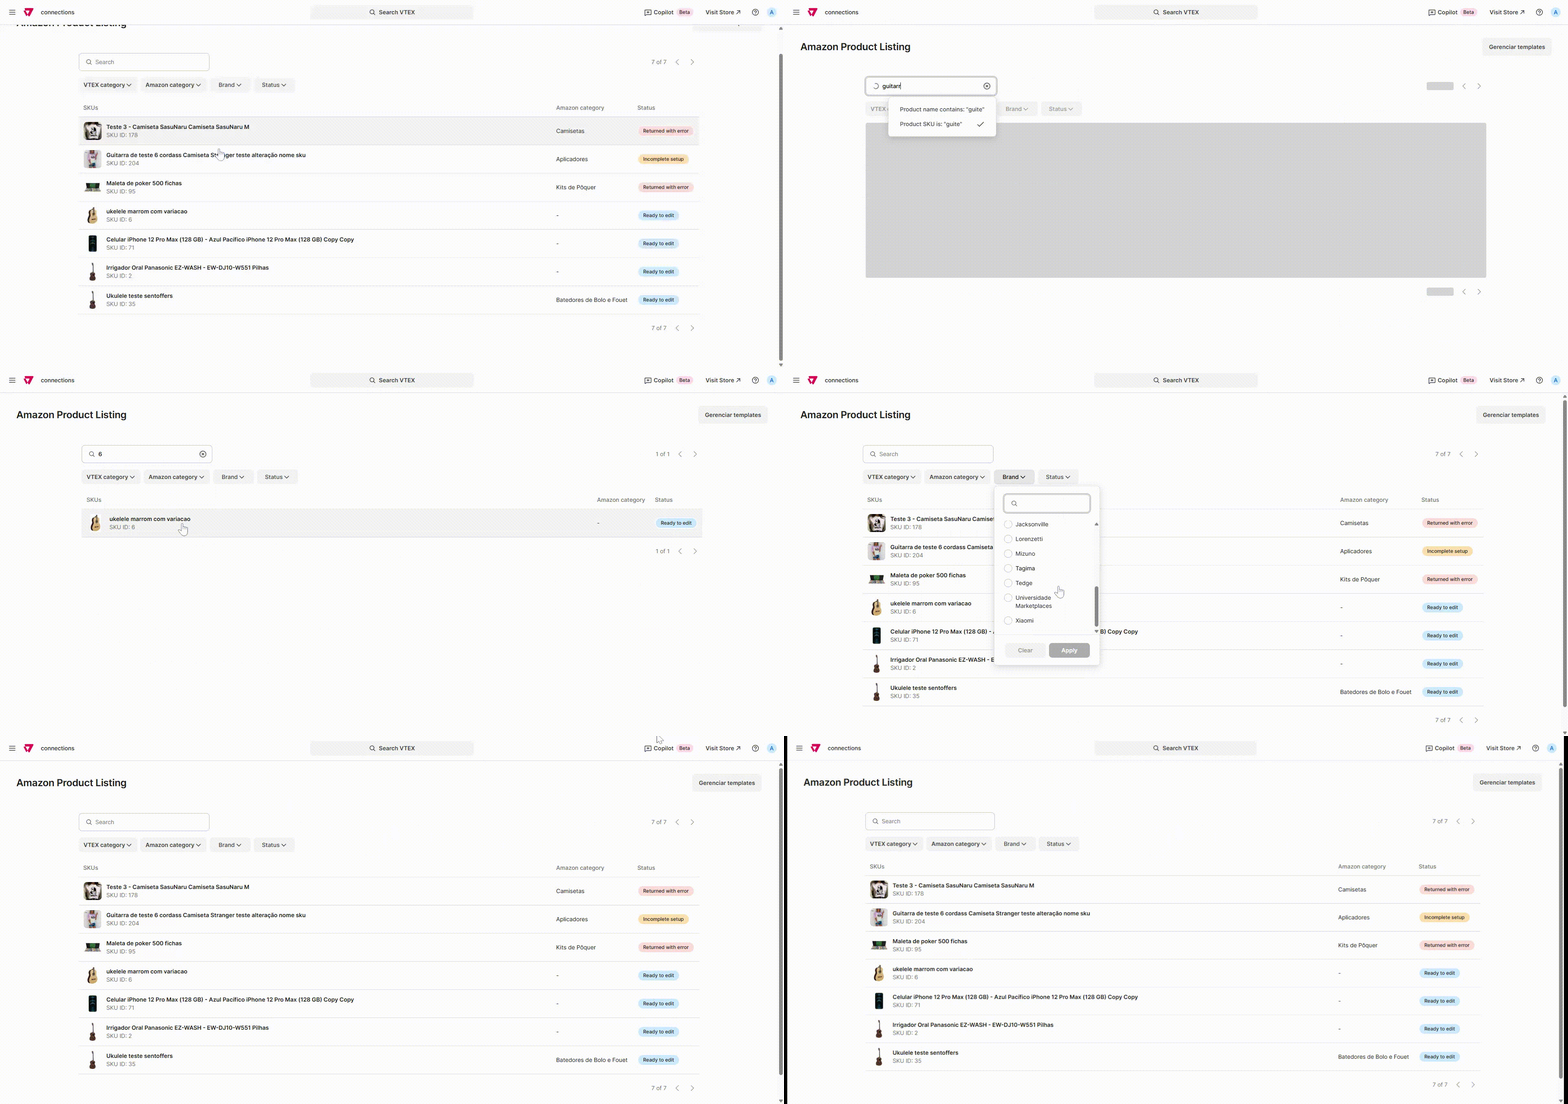
Amazon Listing allows sellers to add products in the VTEX Admin and list them on Amazon. Once you've completed the integration with Amazon, you'll need to make your store products available for listing on the marketplace. There are two ways to do this:
- If the product already exists on Amazon, follow the instructions in the Amazon Offer Matching tutorial to link your product to an Amazon offer.
- If the product doesn't exist on Amazon yet, follow the steps in this tutorial to add the product and create a new offer.

Page overview
To access Amazon Listing, in the VTEX Admin, go to Marketplace > Connections > Amazon Listing, or type Amazon Listing in the search bar.
The page consists of the following sections:
Search bar
In the search bar, you can search SKUs by name or SKU ID. See some examples below.


Filters
You can filter SKUs by VTEX category, Amazon category, Brand, or Status. Filters can be applied individually or combined, depending on the seller's strategy.
Filter types
- VTEX category: Displays the SKU category options from the VTEX catalog.
- Amazon category: Displays the SKU category options available on Amazon.
- Brand: Displays all the brands listed in the seller's catalog.
- Status: Shows the status of the SKUs in the list of products available in Amazon Listing. Each SKU has a status. See below what each status represents:
- Ready to edit: Indicates the SKU is available for the seller to complete the required attributes before sending it to Amazon.
- Incomplete setup: Indicates the SKU has some attributes partially completed by VTEX and requires additional information from the seller.
- Returned with error: Indicates the SKU was sent to Amazon but contains incorrect information. In this case, Amazon returns the SKU error, and the seller must correct and resend it.
- Sent: Indicates the SKU has been completed correctly and sent to Amazon.
- Published: Indicates the SKU has been sent, accepted by Amazon, and available in the marketplace.
SKU list
When you access Amazon Listing, you'll see a list of SKUs from your VTEX catalog that are available for integration with Amazon. Each SKU in the list displays the following information: SKU Name, SKU ID, Amazon category, and Status.
Adding SKUs
The process for adding SKUs is done exclusively via Amazon Listing. You can edit products on this page manually, one by one, or by using previously created templates.
SKUs with previously mapped attributes will appear in the list with the status Incomplete setup. Here's how you can add new SKUs via Amazon Listing:
- In the VTEX Admin, go to Marketplace > Connections > Amazon Listing, or type Amazon Listing in the search bar.
- Select the SKU you want to add.
- Complete the fields Title, Description, Keywords, and Category.
- Click the
Save and sendbutton to validate the SKU and send it to Amazon, or click theFinish laterbutton to save and finish later.
Once the SKU is complete and sent, it enters a processing queue. The status changes to Sent while awaiting approval or rejection from Amazon. If accepted, the SKU status changes to Published. If rejected, the status changes to Returned with error for corrections.
Template for adding products
To streamline the process, you can create templates to apply the same attributes to all the SKUs in the same Amazon category. See below how to create and manage templates.
Creating a template
- In the VTEX Admin, go to Marketplace > Connections > Amazon Listing, or type Amazon Listing in the search bar.
- Click a product with the status Sent or Published.
- Click the
Create templatebutton and a modal will open. - Select the attributes you want to apply to other SKUs in the same Amazon category.
- Click the
Confirmbutton.
Managing templates
On the Template management page, you can filter templates by Amazon category, delete a template, and edit a template.
Editing templates
- In the VTEX Admin, go to Marketplace > Connections > Amazon Listing, or type Amazon Listing in the search bar.
- Click the
Manage templatesbutton. - Select the template you want to edit.
- Make the necessary changes.
- Click the
Savebutton to proceed with the changes, orDiscardto delete the changes made.
When editing a template, you can add new attributes and delete attributes from the existing template. To do this, follow the steps below:
- In the Attributes section, click the button.
- Select the checkbox for the attributes you want to include or remove.
- Click the
Confirmbutton.
When you edit a template, an option to view the changes will be displayed in the page footer.
All changes made to the template will apply to SKUs in the same category that haven't been sent yet.
Deleting templates
- In the VTEX Admin, go to Marketplace > Connections > Amazon Listing, or type Amazon Listing in the search bar.
- Click the
Manage templatesbutton - In the template you want to delete, click the
trash canbutton. - In the modal displayed on the screen, click the
Finishbutton.