Activating Checkout v6
2 min read
For more on the Checkout v6 advantages, access our article on the new SmartCheckout™ release.
To update your store's checkout to the latest version (Checkout v6), you must enable it in both Test and Production environments.
Activate Checkout v6 in Test Environment
- In the VTEX Admin, go to Store Settings > Storefront > Checkout, or type Checkout in the search bar at the top of the page.
- Click on the icon of the desired website.
- In the blue options menu located at the top of the page, click on Checkout.
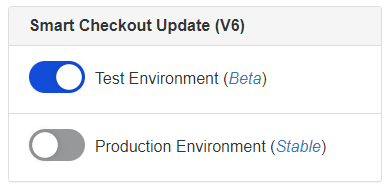
- Under Smart Checkout Update (V6), enable the Test Environment (Beta) option by clicking the button.
- Click
Save. - Access your store in beta/test environment and implement the necessary style adjustments. Checkout v6 has new CSS classes that you need to be mindful of when performing style customizations.
Activate Checkout v6 in Production Environment
After the necessary adjustments are completed, you can activate Checkout v6 in the production environment, by following the steps below:
- In the VTEX Admin, go to Store Settings > Storefront > Checkout, or type Checkout in the search bar at the top of the page.
- Click on the icon of the desired website.
- In the blue options menu located at the top of the page, click on Checkout.
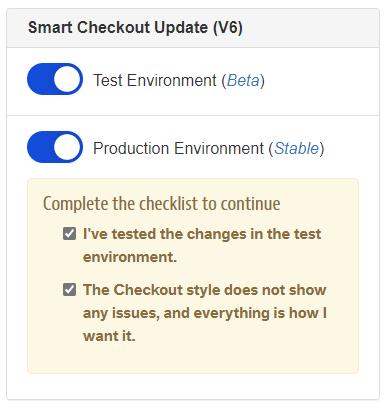
- Under Smart Checkout Update (V6), enable the Production Environment (Beta) option by clicking the button and in the two checkboxes of the checklist.
- Click
Save.
After this step, Checkout v6 would be installed in your store.
How to ascertain whether Checkout v6 was properly installed?
- Access the URL
{{accountName}}.myvtex.com/checkout - Press
Ctrl + Uon a Windows machine orOpt + Cmd + Uif you're using Mac. The page's source code will be displayed. - Press
CTRL + Fon a Windows machine orCmd + Fon a Mac to open the browser search box. - Search for
checkout-ui/v6. If you come across//io.vtex.com.br/checkout-ui/v6.x.x/style/style.cssin the source code, the migration to Checkout v6 was successful.