A data entity is a representation of a set of information about a given concept. Each entity includes fields with information that makes up the entity.
For example, imagine a system that controls a library. This system controls books that customers can borrow. Thus, we can notice that these three concepts (book, customer, borrowing) are entities that contain information about each one.
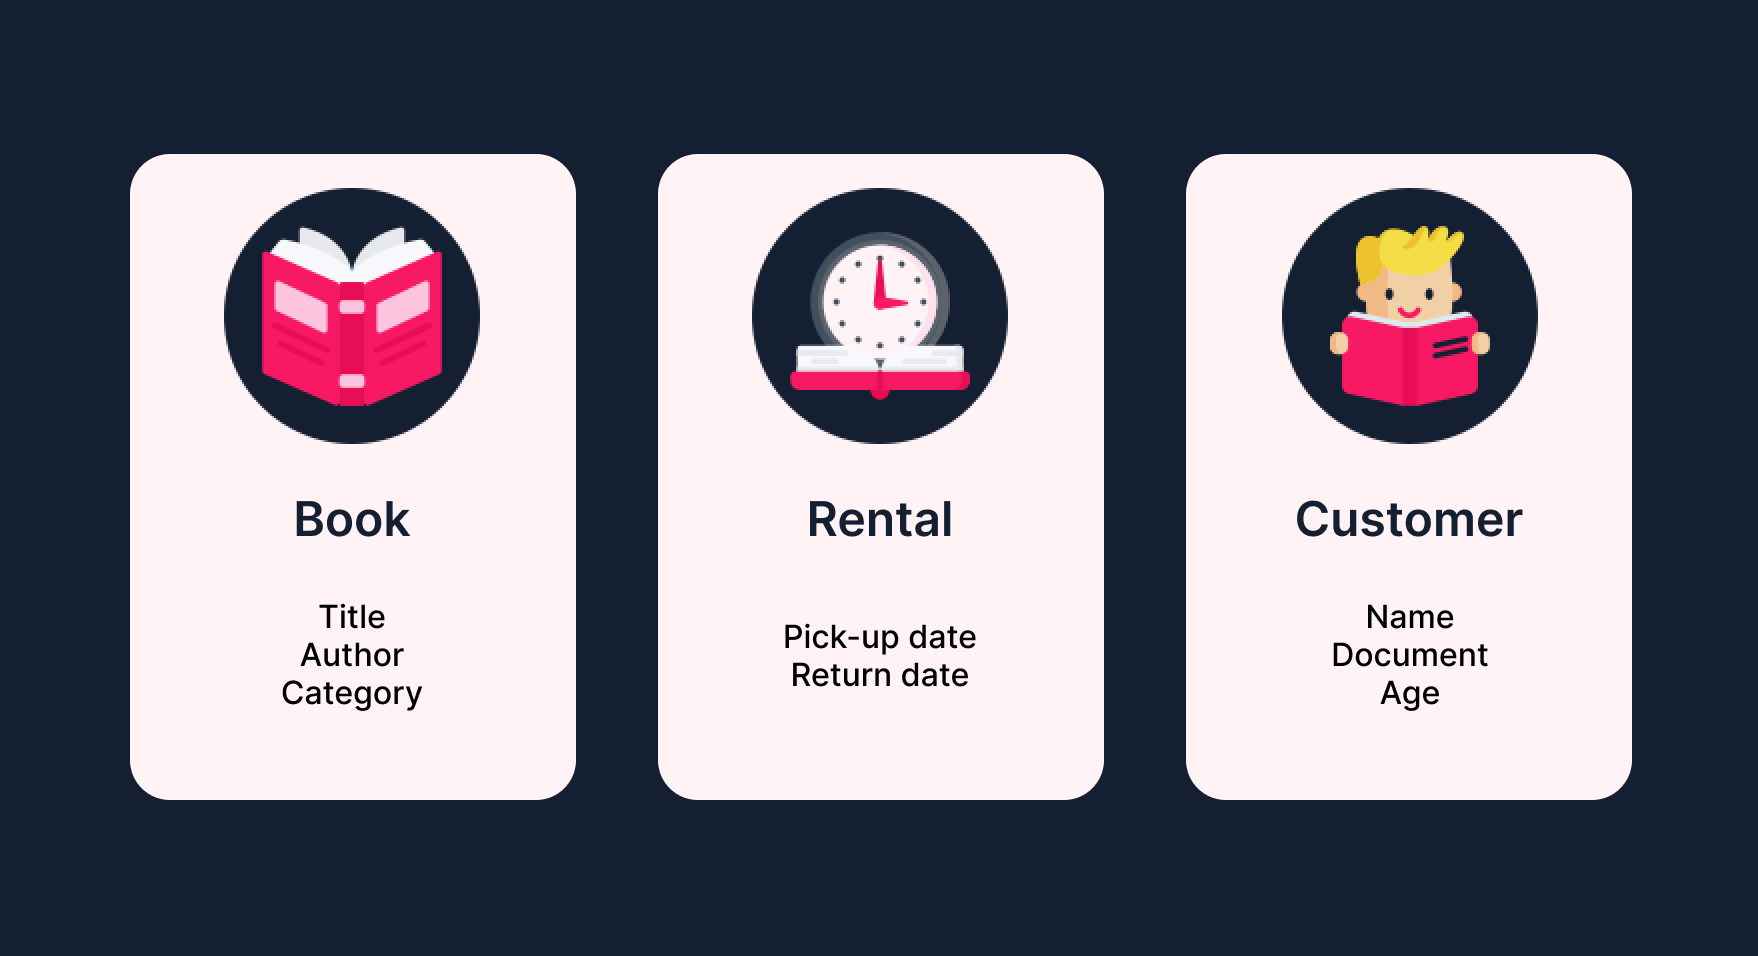
With these concepts in mind, you can set up several data control scenarios in Master Data. By default, the following data entities are considered: customer, address, stores, etc. You can create as many data entities as you want to develop a customized environment tailored to your store's needs.
This article outlines the Master Data v1 operation. You should evaluate which Master Data version meets your needs or is in use in your operation. Learn more:
Data types
The data entity consists of fields that have a type. This type identifies the information characteristics stored in the field and enables validations, filters, and calculations based on the selected value.
When creating a field, the following types are displayed:
| Field type | Description |
|---|---|
| Auto Increment | Stores integers and is automatically incremented, which means that for each new record, this field receives the value of the previous record + 1. |
| Boolean | Stores true or false information, which means it will always be completed as true or false. |
| CEP | Stores a CEP (postal code in Brazil). |
| CPF / CNPJ | Stores the CPF and CNPJ information (taxpayer registration number and company registration number in Brazil, respectively). |
| Currency | Stores information in currency format. |
| Date | Stores date information. |
| Date and Time | Stores date and time. |
| Decimal | Stores numbers with the fractional part always set to 2. This field will always store 2 digits as decimal places of the value entered. |
| Stores an email. | |
| File | Stores a file. The maximum size accepted must be set up in the field’s options via the gear icon button. |
| Integer | Stores integers, i.e., numbers without the fractional part. It stores whole numbers between -2147483648 and 2147483647. |
| Long | Similar to Integer but can store more numbers. Stores from -2⁶³ to 2⁶³-1. |
| Percent | Stores information in a percentage format. |
| Phone | Stores information in a phone number format. |
| Relationship | Creates a relationship with another entity. The term relationship refers to displaying an entity’s information in another entity. For example, in the library example, the Customer may also appear in the Borrowing record. To do so, you just have to establish a relationship between Borrowing and Customer by using the Name field under Borrowing and selecting the Relationship type in the settings. The Customer field to be displayed must also be selected for the Name field to be selected. |
| Score2 | Field consisting of key, value, and expiration date. For example: This can be used to control purchases made by each customer, storing the amount and quantity of purchases. This field needs to be completed through the Update scores or the Update score by field endpoint from Master Data API v1. |
| Text | Stores numbers, letters, and special characters, without a character limit. |
| Time | Stores time information. |
| URL | Stores a URL. |
| User Login | Automatically selects the user logged in. This is used to record the email of the user who performs an action on an entity record. |
| Varchar 10 | Stores numbers, letters, and special characters, limited to 10 characters. |
| Varchar 100 | Stores numbers, letters, and special characters, limited to 100 characters. |
| Varchar 50 | Stores numbers, letters, and special characters, limited to 50 characters. |
| Varchar 750 | Stores numbers, letters, and special characters, limited to 750 characters. |
Creating data entities
Follow the steps below to configure a new data entity.
-
In the VTEX Admin, go to Store Settings > Storefront > Master Data.
-
In Master Data, click Applications > Advanced Settings > Data structure.
-
Click the Data Entities tab.
-
Click the
Addbutton. -
Complete the Acronym field with 2 letters that identify the data entity. These letters will be the initials of the field that identifies the record. For example: use the acronym SP for identifier SP-0001.
-
Complete the Name of the data entity you want to create.
-
Select the type of primary key, which can be:
- GUID: A unique sequence of numbers and characters that identifies a record.
- Primary key must be given using the 'ID' property: This key does not automatically create an identifier field, which must be created manually and named ID.
-
If you need to consult records without a filter and without authentication, check the option Allow all document query without filter. Note: This setting is critical because it allows all the records in the database to be listed via the API.
-
Complete the Fields tab with the fields you want to include in the new data entity, indicated as follows.
-
Complete the Name column with the field's identification value. Do not insert spaces or special characters. Example: CustomerName.
-
Complete the Display Name column with the name that will be displayed on the form. Example: Customer name.
-
Select the field type based on the options described in the Data types section.
-
Click the gear icon to open the field configuration options.
-
Complete the General settings:
- Is nullable?: Check this option to create or edit a record with a blank (void) field. If this option is unchecked, you cannot create a record without a value in this field.
- Make readable without credentials: Check this option to allow the field data to be read without authentication, using the Master Data API.
- Allow editing without credentials: Check this option to allow data to be entered into the field without the need for authentication, using the Master Data API.
- Allow filtering without credentials: Check this option to filter field data without the need for authentication, using the Master Data API.
-
Complete the Search and filter settings:
- Is searchable?: If this field is used for searching in the form and via API.
- Is filterable?: If this field is used to filter the form and via API.
-
Add a field description.
-
To add more fields, click the
New Fieldbutton and repeat steps 10 to 16. -
At the end of the field definition, click the
Savebutton to complete orSave and Newto create a new data entity.You will be redirected back to the Data Entity tab.
-
In the row of the newly created entity, click the diskette button to publish the created data entity.
-
Click
OK. -
Click the Applications tab to return to the Master Data homepage.
-
Click the
Reload Applicationsbutton.
After creating the data entity, create the form for adding, changing, and displaying data in Master Data.