The next step is to create accounts for the customers you want to offer credit to in your store. Accounts can be created in three different ways:
- Individual account (Admin VTEX)
- Multiple Accounts (Admin VTEX)
- Individual account (Customer Credit API)
Accounts created in the Customer Credit app have no relationship or share data with the customer base registered in the store's Master Data entities. For a customer to be able to use Customer Credit as a payment method, their account must be registered by the merchant in the app even if the customer already has an account in the store.
Create accounts individually
To register a new customer in Customer Credit, follow the steps below:
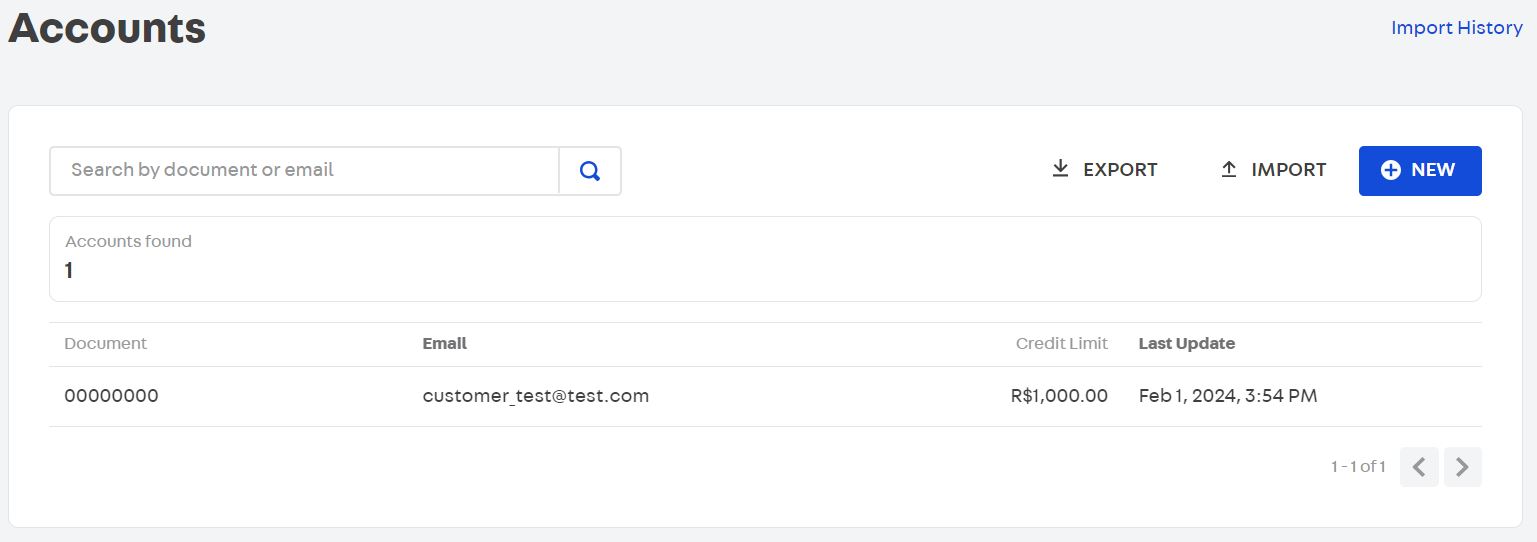
- In the VTEX Admin, access Apps > Customer Credit > Accounts, or type Accounts in the search bar at the top of the page.
- On the Accounts screen, click the
NEWbutton. - In Identification, select the Document type and fill in the Document and Email fields with the information of the customer you want to register.
- In Credit, enter the Credit Limit (BRL) and Tolerance values that you want to make available to the customer.
- Click
Confirm.
Filling in the Email field is mandatory, as the VTEX platform uses this information to authenticate the customer's access to the credit limits of their account. For more information about data protection, visit SmartCheckout Security.
From this moment on, the new account created will be displayed on the Accounts screen.
Create multiple accounts (bulk import)
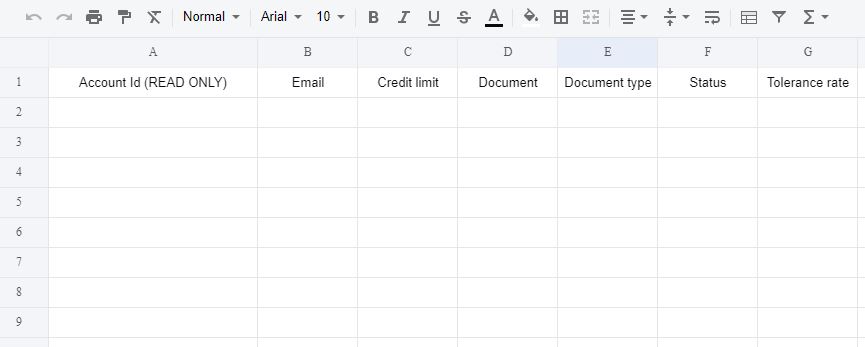
To create multiple accounts at the same time (in bulk) in Customer Credit, you can use a template spreadsheet in CSV (Comma Separated Value) format containing each customer's information. Follow the steps below to create multiple accounts:
- In the VTEX Admin, access Apps > Customer Credit > Accounts, or type Accounts in the search bar at the top of the page.
- On the Accounts screen, click the
IMPORTbutton. - In Do you want to create or update accounts?, select the Create option and click
CONTINUE. - Click on
DOWNLOAD TEMPLATE. A spreadsheet template in .csv format will be sent to your device (computer, cell phone or tablet). - Fill in each line:
From this moment on, new accounts created via the .csv spreadsheet will be available on the Accounts screen.
It is also possible to track previous processes of creating multiple accounts, identifying whether the accounts were created correctly. To check this information, click on Import History on the Accounts screen.
Update multiple accounts (bulk import)
To update information, such as document, document type, email, credit limit and tolerance, in multiple accounts at the same time, you can also use the bulk import functionality.
The procedure is similar to create multiple accounts. However, you must already have the .csv spreadsheet downloaded and filled out on your device (computer, cell phone or tablet). Follow the steps below to update customer information:
- In the VTEX Admin, access Apps > Customer Credit > Accounts, or type Accounts in the search bar at the top of the page.
- On the Accounts screen, click the
IMPORTbutton. - In Do you want to create or update accounts?, select the Update option and click
CONTINUE. - Insert or select the .csv spreadsheet in the space Drop your CSV here or choose a file here.
- Click on the IMPORT FILE button.
- After the spreadsheet is loaded into Admin, check on the Accounts screen whether the information was updated correctly in each customer's accounts.
Create account via API
You can also create accounts for your customers in Customer Credit through the endpoint POST - Open an account.
For more information about Customer Credit API endpoints, visit Customer Credit API - Overview.