To configure a VTEX Intelligent Search merchandising rule using Visual Editor, follow the steps below.
-
In the VTEX Admin, go to Storefront, or type Storefront in the search bar at the top of the page.
-
Under Intelligent Search, click Merchandising Rules.
-
Click the
+ Newbutton. -
Complete the following fields:
- Rule name: Merchandising rule name. Example: Promote product A when searching for a chocolate cookie.
- Start date (optional): Set a date from which the merchandising rule will apply. The date follows the UTC-0 time zone.
- End date (optional): Set a date when the merchandising rule will no longer apply to store searches. The date follows the UTC-0 time zone.
- Apply to locales: Languages to which the merchandising rule will apply. The field is only available for stores using Multilanguage settings (Beta).
-
Click Visual Editor. Read the Types of editing section for more information about each editor.
-
Click
Next. -
Define at least one search term or filter for applying the merchandising rule:
- To define a search term, type the term in the search bar (item II in the Actions available in the Visual Editor section).
- To create a filter for applying the merchandising rule (item III in the Actions available in the Visual Editor section), follow the steps described in the Adding filters and conditions section.
-
You can also perform the following additional actions to customize the search results.
-
Define the number of items per row in the search results.
-
Define the number of items per page in the search results.
-
Hide products in the search results.
-
Pin products to the top positions of the search results.
-
Drag the pinned product to the desired position in the search results.
-
Edit the initial settings of the merchandising rule, including the rule name, start and end dates, and the locales to which it will be applied if the store uses the Multilanguage settings (Beta).
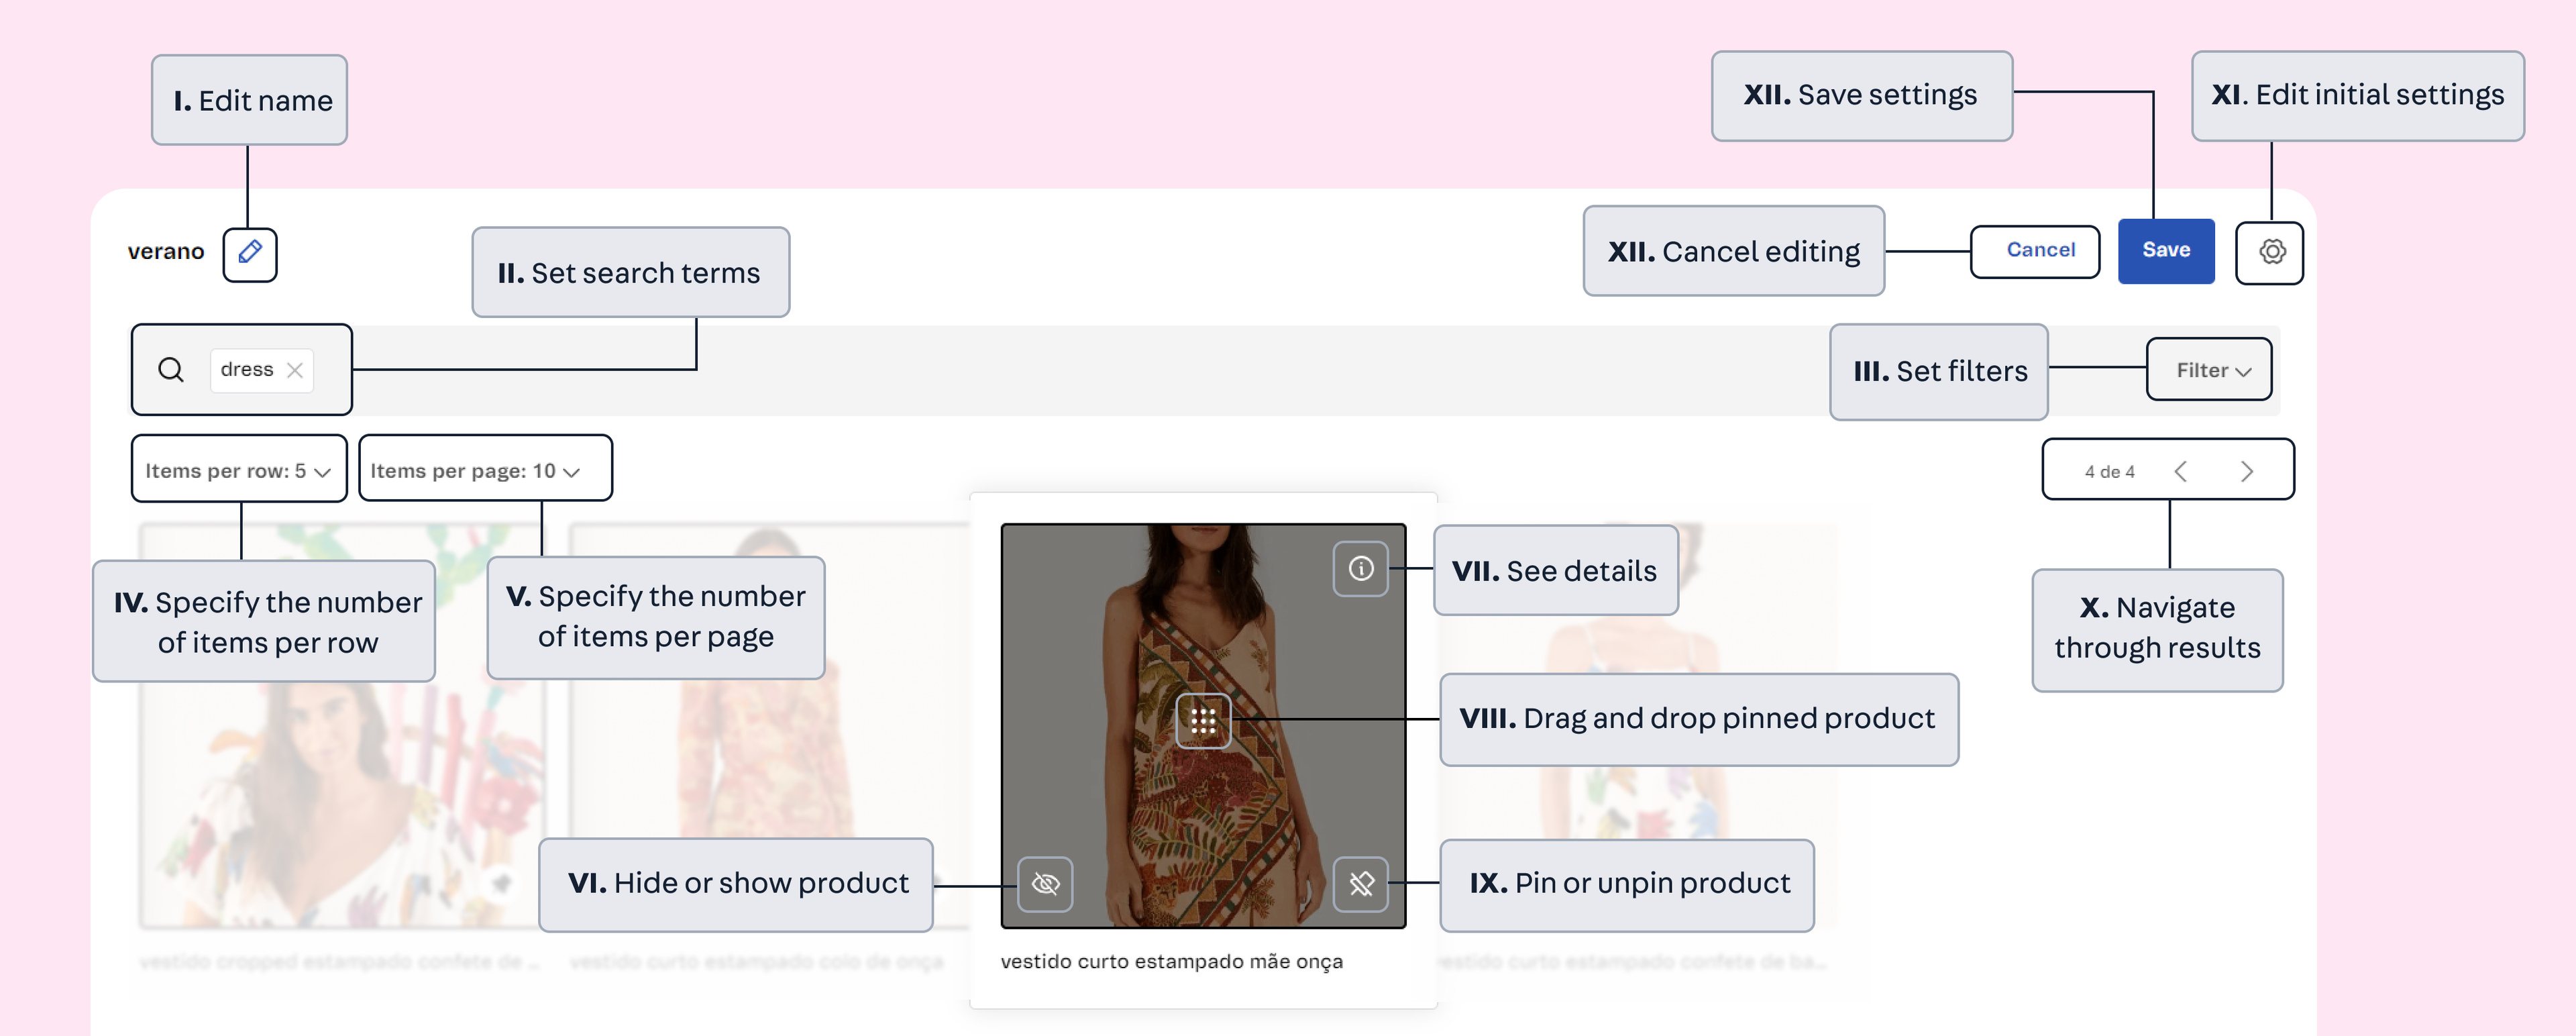
Learn more about these actions in items IV, V, VI, VIII, IX, and XI of the Actions available in the Visual Editor section.
-
-
Click
Save.
After saving, the changes to merchandising rules will take an average of two minutes to be updated.
Actions available in the Visual Editor
The Visual Editor for merchandising rules in VTEX Intelligent Search allows you to perform the actions shown in the image below:
Adding filters and conditions
Filters are predefined selectable attributes that narrow the search results, such as filtering for all products in a category or brand, among other conditions. You can add one or more conditions to a filter.
To add a condition using the Visual Editor, follow the steps below.
- Click
Filter. - Click
+ Add condition. - Fill in the desired conditions. The available options are detailed in Merchandising rule conditions.
- Click
Save.
The defined conditions can work together (and) or alternatively (or).
In the menu of each existing condition, you can Duplicate or Delete the condition. To deactivate all created conditions, click Clear filters.