At VTEX, it is possible to integrate with the payment provider Adyen. Through this connector, your store can offer payment transactions in physical stores (VTEX Sales App), using points of sale (POS). For more information access What is VTEX Sales App?.
To use the AdyenV3 affiliation in your store through other online sales channels (except VTEX Sales App), visit Configuring payment with AdyenV3.
To use the AdyenV3 affiliation in the VTEX Sales App, you need to:
- Configure point of sale (POS)
- Configure your Adyen environment
- Configure AdyenV3 Connector (VTEX Sales App) on VTEX
- Configure payment condition
Settings configured in an environment external to VTEX may be discontinued or modified without prior notice. Please check your Adyen account for the latest information.
Configuring point of sale (POS)
The first step is to configure your Adyen and VTEX accounts to allow point-of-sale (POS) payment transactions. To perform these settings, access the following documentation:
Configuring your Adyen environment
The steps described below are the minimum required settings for configuring the Adyen connector correctly. Client customizations or enabling specific payment methods or platform features have to be done following the Adyen documentation.
To enable VTEX access to the Adyen environment, follow the instructions below:
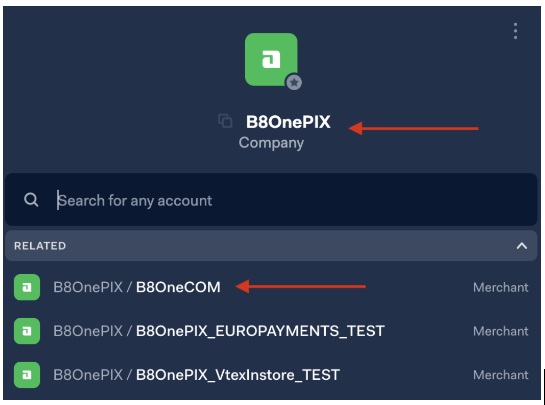
Getting the Company and Merchant account credentials
- Log in to your Customer Area on Adyen.
- In the left sidebar, copy and save the information shown above Company. This is your Company account.
- In the list below Company, search for the Merchant Account that will be used (highlighted in white). Copy and save this information.
Getting the POS Live URL
This information is related to the endpoints used by Adyen's endpoint APIs in a production environment. For more information, visit the Adyen docs.
Getting the Live URL prefix
- In the sidebar, go to Developers > API URLs.
- Click
Copyin the Prefix field, and store the information in a safe place. This prefix controls your endpoint on the Adyen platform.
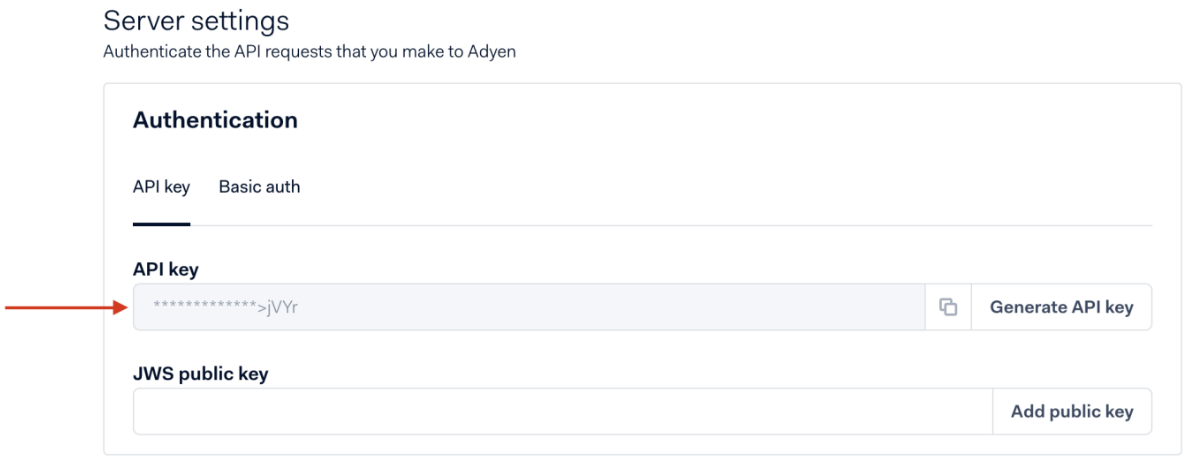
Getting the API Key
The steps below assume that the API Key has been previously generated in the Adyen environment. If you need to create them, see the Adyen documentation.
- In the sidebar, click Developers and, then, click API credentials.
- Select your API credential.
- In Server Settings > Authentication, select API key.
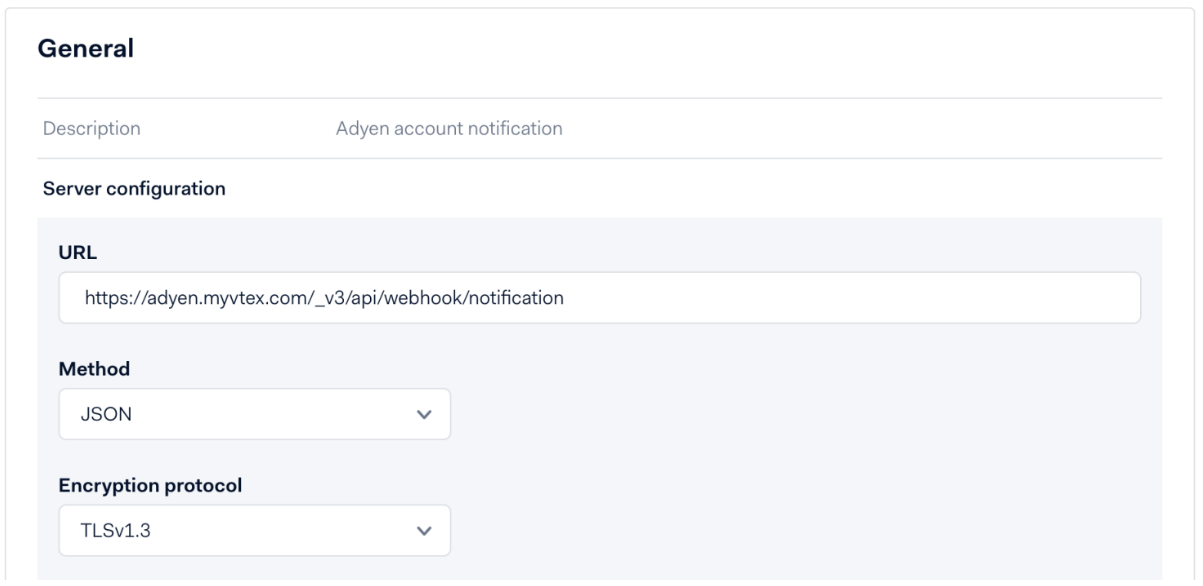
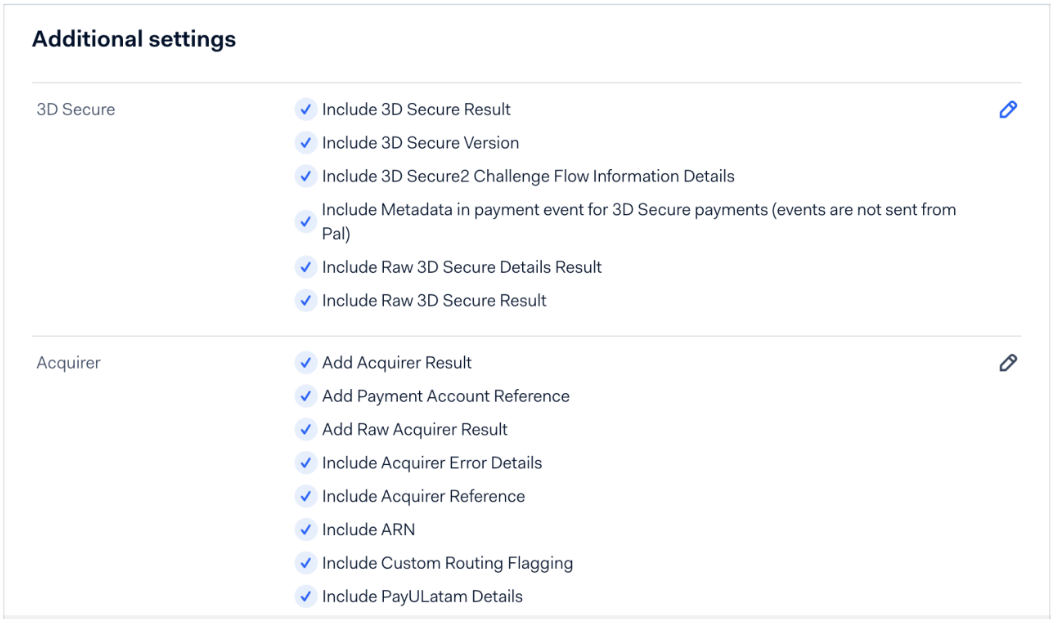
Configuring a webhook
You need to configure a webhook to allow Adyen to send payment status updates to your VTEX account. For more information, see the Adyen Webhooks documentation.
Follow the steps below to configure a webhook:
- In your Customer Area on Adyen, go to Developers > Webhooks.
- Click the blue
+ Webhookbutton. - In the Standard Webhook option, click Add.
- In General > Description, add a description for the new webhook. Example: "Webhook Adyen Connector Provider v3".
- In General > Server configuration > URL, enter the URL of your VTEX account. Example: https://{{account}}.myvtex.com/_v3/api/webhook/notification.
If you have several stores, you need to configure a webhook for each of them.
Configuring AdyenV3 Connector (VTEX Sales App) on VTEX
- In the VTEX Admin, go to Store Settings > Payments > Providers, or type Providers in the search bar at the top of the page.
- On the providers screen, click the
New Providerbutton. - Type the name AdyenV3 in the search bar and click on the name of the provider.
- In Application Key, fill in the name of your Merchant account (step 3 in the Getting the Company and Merchant account credentials section).
- In Application Token, fill in the API Key (step 4 in the Getting the API Key section).
- If you wish to modify the identification name to be displayed for the AdyenV3 provider on the VTEX Admin screen, enter the information in the Name field in Basic Information.
- In Payment Control, select whether you want to activate the provider in a test environment by clicking Enable test mode.
- In Live URL prefix, fill in the prefix available in Adyen customer area (step 2 in the Getting the Live URL prefix section).
- In Company account, enter the name of your Company account (step 2 in the Getting the Company and Merchant account credentials section).
- In Live POS URL, fill in endpoints used to access Adyen terminal APIs. Learn more at Adyen documentation.
- The Client Key field is not necessary to fill in, as it is only applicable to other types of online sales channels.
- In Auto Capture Settings, select when you want to capture the payment.
- Click
Save.
Configuring payment condition
- In the VTEX Admin, go to Store Settings > Payments > Settings, or type Settings in the search bar at the top of the page.
- In the Payment Conditions tab, click on the
+button. - Click on Venda Direta Debito or Venda Direta Credito.
- Under Process with affiliation, select the previously configured connector.
- Activate the condition in the Status field.
- If you want to use an anti-fraud system, select the option Use anti-fraud solution.
- If you want, you can also configure special payment conditions.
- Click on
Save.
After completing these steps, the AdyenV3 Connector may take up to 10 minutes to appear as a payment option in your store's VTEX Sales App.